Fat Tuesday Calls For Fat Brownies!

Happy Fat Tuesday!!!

I thought about sharing my trip to New Orleans today, but I’ll save that for #tbt because I realized I owe you guys a recipe, and do I have a show stopper…and you might want to get out your stretchy pants because I make no promises that you will be able to refrain yourself from eating the entire batch!

Now, I know how easy brownies can be to make from scratch and I always have all the ingredients, but I also make sure to have a box ( yea, you heard me, a box!) of my favorite brownie mix. There is nothing wrong with taking a short cut, especially if you need dessert in a pinch. After many years, my go to mix is Ghirardelli. It taste the closest to many homemade recipes I have tried.

I remember last year coming across many recipes for “the brookie” or “crownie” half brownie/half chocolate chip cookie (hellloooo best dessert ever) which emulated the wonderful dessert, The Brookster, that Baked NYC introduced to the world a few years ago and now thanks to Pinterest I stumbled upon a recipe that has now gone viral that took the brookie up…….another notch! (insert Emeril Lagasse Voice)

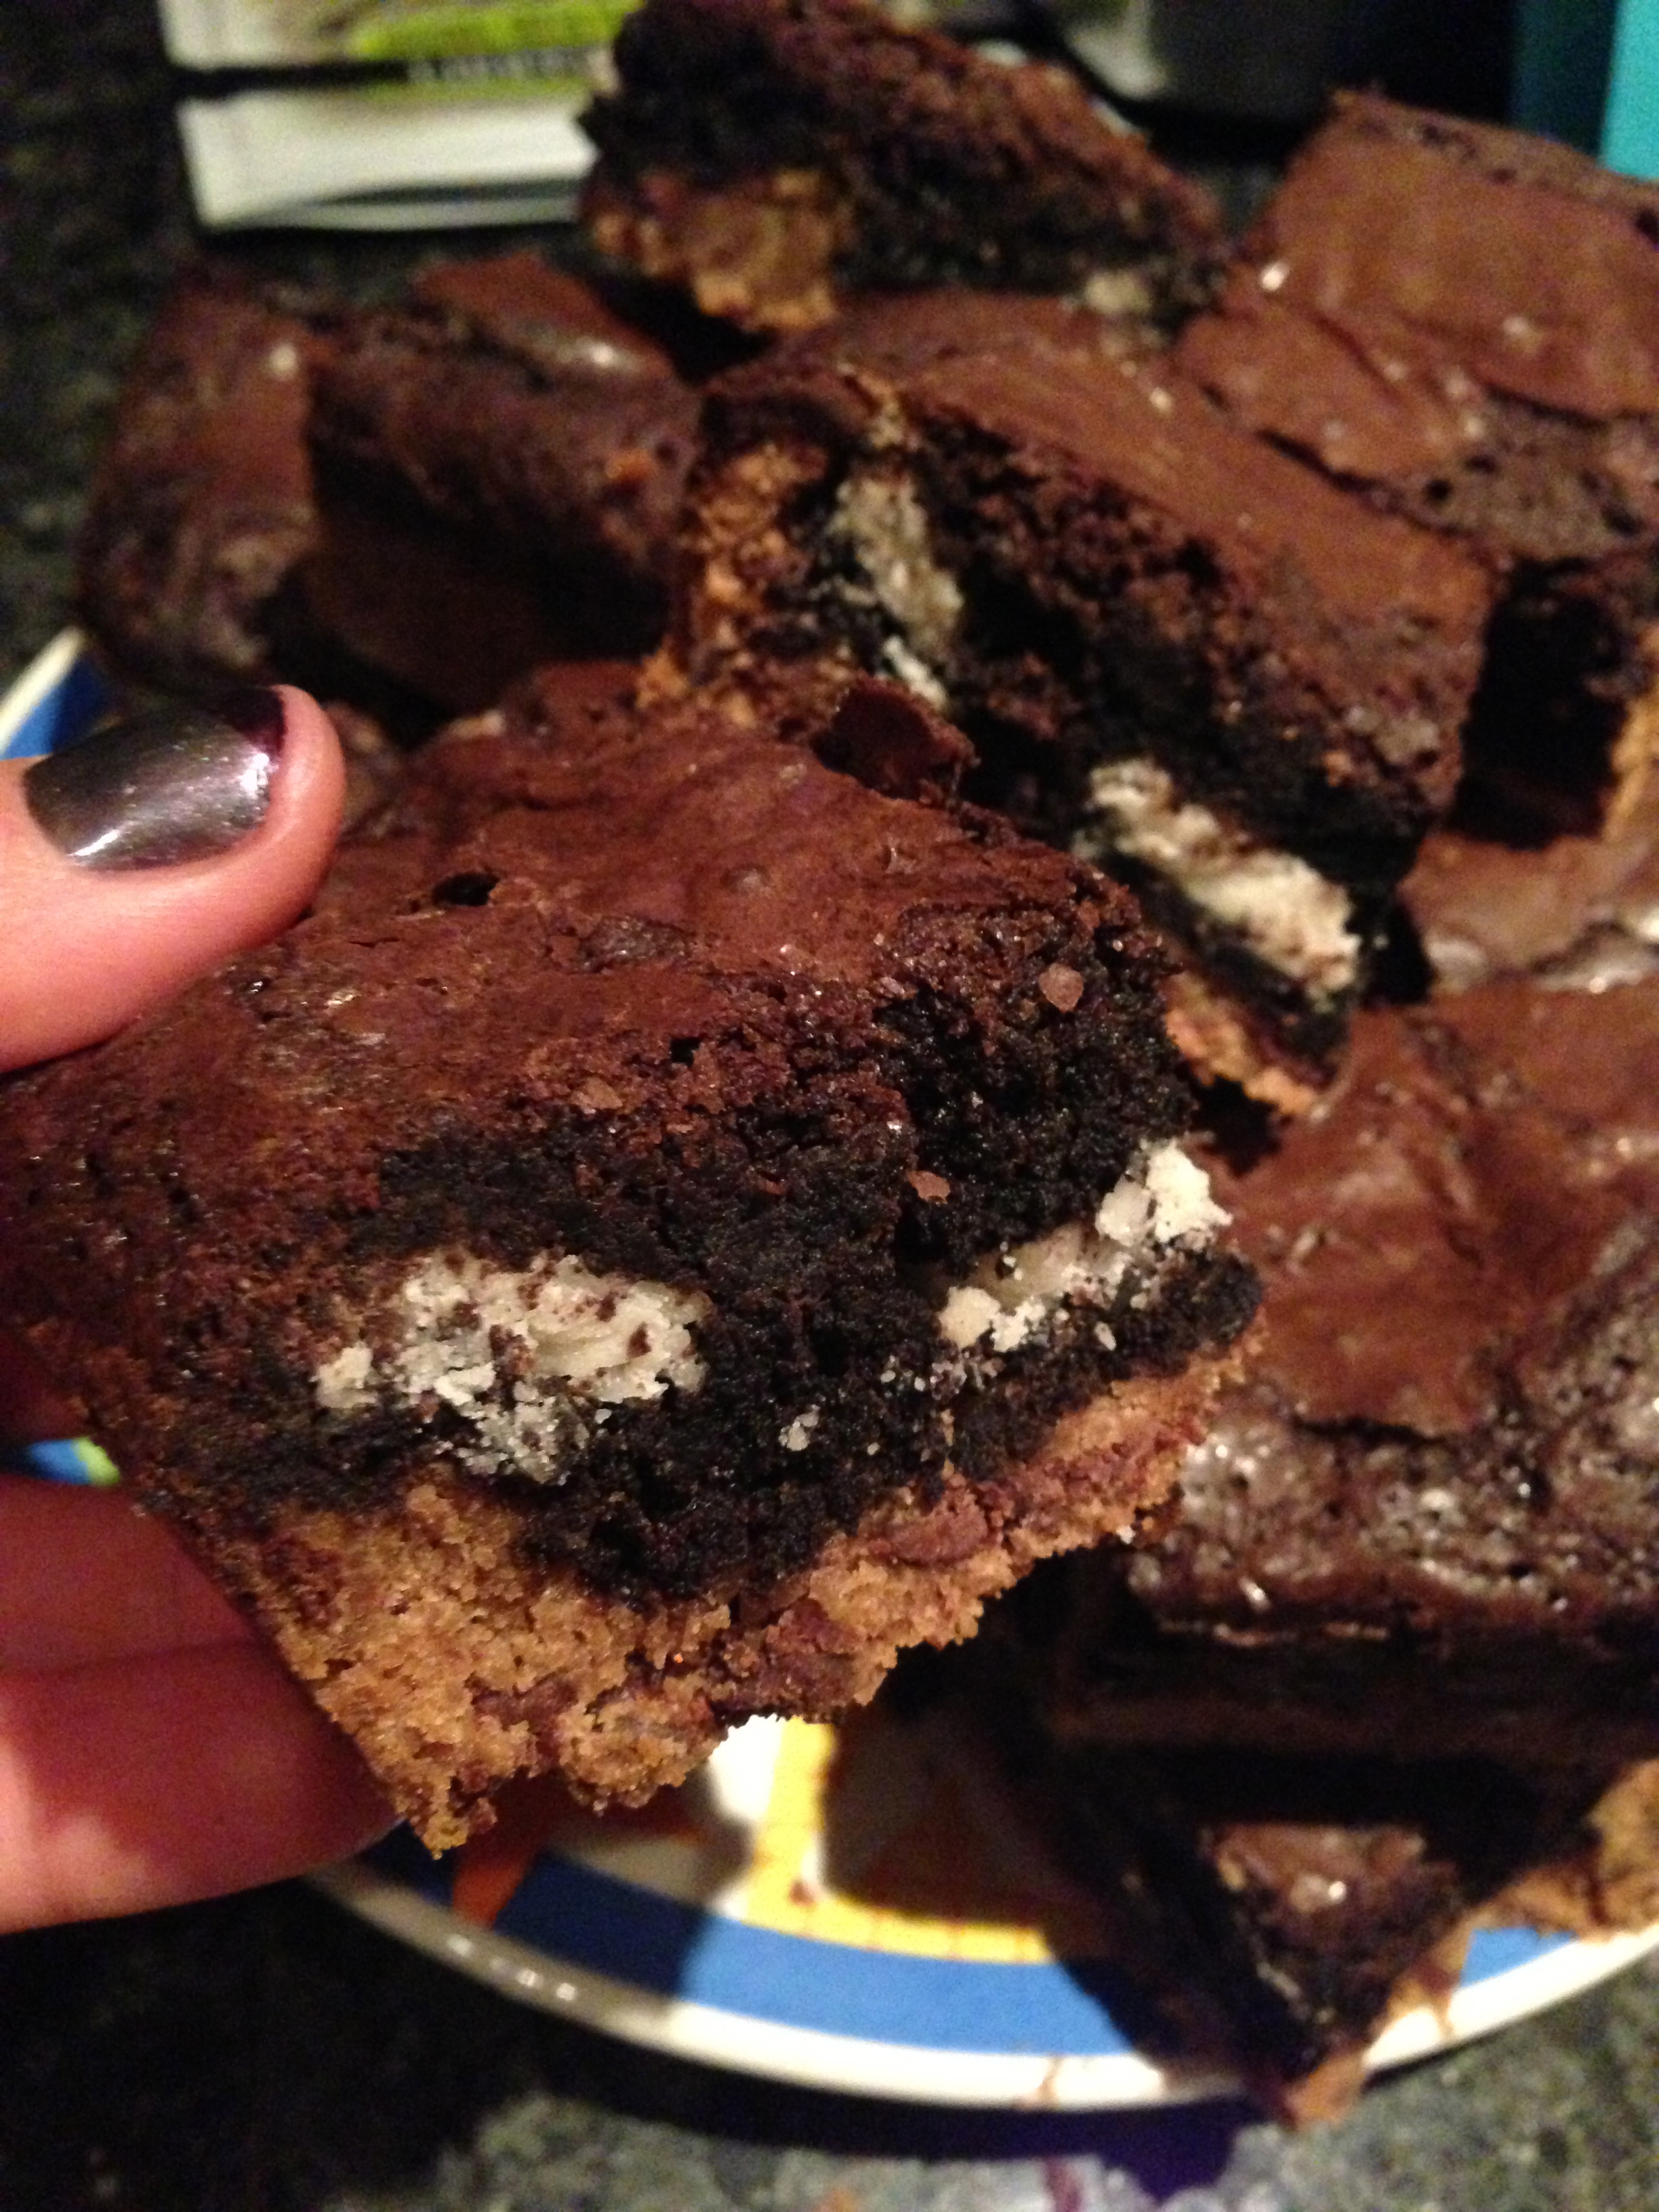
I give you, “The Slutty Brownie” which sandwiches Oreos between layers of Fudgy Brownie and Chocolate Chip Cookie…oh, you naughty brownie you 😉

What is so great about this recipe is that I use A LOT of help from the store. My Ghirardelli boxed brownie mix, a roll of Toll House cooke dough (you know you still love it too!) and a package of Oreos. The only extra ingredients you need are what’s required for mixing up the brownie mix. I promise you that you will make instant friends wherever you bring these brownies!!

Slutty Brownies

Ingredients

1 Box of your favorite Brownie Mix, prepared as directed

1 roll of cookie dough

1 package of Oreos (maybe even a few left over for eating!)

Directions

Preheat oven to 375. Make brownie batter according the package. Set aside. Grease glass 9×13 dish and press cookie dough on bottom. Line your Oreo cookies in the pan. Pour the brownie batter on top. Bake in oven for 45 minutes. Let cool and enjoy!

I have some pretty exciting recipes and food adventures coming up that I can’t wait to share! One of my bestest friends, Brittany, is celebrating her birthday this weekend so I will be heading into NYC for birthday celebrating and a food crawl!!! The next few weeks will also be busy with writing report cards and other school commitments, but I will do my best to bring you some tasty treats!

IMG_2156

With Love and Sugar, Kristen xo.

Time To Warm Up!

One thing that makes me look forward to the winter months here in New York are warm, comforting, and hearty meals. With the temperatures still being veryyy cold, chili is definitely an easy  go to meal and what’s so great about chili is that there are many different ways to make it which means you can switch it up and feel like you’re having a new meal each time you make it. The one we made tonight is from Giada’s cookbook, “Giada At Home.”  I can prepare it when I get home from work and it can cook away on the stove while I complete any school work I might have before dinner. Wahoo!!

40208_636887650123_3706676_n

I have been a long time fan of Giada DeLaurentiis since I first caught an episode of her show “Everyday Italian” on my tiny dorm room TV and she was making Chicken Tetrazzini. It looked yummy and she made it sound so easy. I quickly looked up the recipe and noticed that the ingredient list was simple too. She really inspired me to get in the kitchen. She gave me the confidence that I could cook anything! Many of her recipes are not only easy to follow but taste amazing. I have collected all of her cookbooks, met her at several book signings, and continue to watch and follow her.  I even learned that our families are from the same region in Italy. Needless to say, this will not be the last recipe of hers you will see on here.

IMG_2609

This recipe calls for all species that I keep in my spice rack at all times! The only change I make is I omit the fennel seed. I actually like fennel, but my mom is not a fan so I just leave it out. No biggie. I love the she puts swiss chard and corn in this recipe! What a great addition to a chicken chili, and you know what’s even better than a quick meal? …having enough leftover to bring for lunch the next day!!! You need this recipe in your life!!!

White Bean and Chicken Chili

Ingredients
2 tablespoons olive oil
1 large onion, chopped
4 garlic cloves, minced
2 pounds ground chicken
1 teaspoon salt, plus more for seasoning
2 tablespoons ground cumin
1 tablespoon fennel seeds
1 tablespoon dried oregano
2 teaspoons chili powder
3 tablespoons flour
2 (15-ounce cans) cannellini or other white beans, rinsed and drained
1 bunch (about 1 pound) Swiss chard, stems removed, leaves chopped into 1-inch pieces
11/2 cups frozen corn, thawed
4 cups low-sodium chicken stock
1/4 teaspoon crushed red pepper flakes
Freshly ground black pepper for seasoning
1/2 cup grated Parmesan cheese
1/4 cup chopped fresh flat-leaf parsley

Directions
In a large heavy-bottomed saucepan or Dutch oven, heat the oil over medium-high heat. Add the onion and cook until translucent, about 5 minutes. Add the garlic and cook for 30 seconds. Add the ground chicken, 1 teaspoon salt, cumin, fennel seeds, oregano, and chili powder. Cook, stirring frequently, until the chicken is cooked through, about 8 minutes. Stir the flour into the chicken mixture. Add the beans, Swiss chard, corn, and chicken stock. Bring the mixture to a simmer, scraping up the brown bits that cling to the bottom of the pan with a wooden spoon. Simmer for 55-60 minutes until the liquid has reduced by about half and the chili has thickened. Add the red pepper flakes and simmer for another 10 minutes. Season with salt and pepper, to taste.

Ladle the chili into serving bowls. Sprinkle with the Parmesan cheese and chopped parsley.

IMG_2610

I usually like chili with a nice wedge of cornbread on the side, but to my dismay, I realized we didn’t have cornmeal in the pantry!! boo…(note to self, add it to the food shopping list) Luckily, we did have some tortilla chips to serve it up with! Mmmm…warmed me right up! Perfect meal for a “chili” night…sorry…I couldn’t help myself…

With love and sugar, Kristen xo.

Give Me Some of That Yum Yum Chocolate Chip…

I know Salt-N-Pepa were not talking about cookies in their hit song from the early 90s, but I am…

Fact. I love cookies…and I hope you all do too, because I promise you that there will be many more cookie recipes to follow. Most of my cookie baking happens during December for obvious reasons (SANTA!!) and then I have my year round cookie recipes that I make whenever I need my cookie fix. 

The one I made today is ‘Vanishing Oatmeal Raisin Cookies’ which can be found under the lid of the Quaker Oatmeal container. My family request this one so much that I have it memorized. It was snowing here again this morning so I decided to mix up a batch. I asked my sous chef, aka mom, to help me out. She and I really make the perfect team. I bake and she cleans the dishes! haha…it’s a nice little system we have.  


Image

The recipe calls for 1-cup of raisins, but I opted for 1-cup of chocolate chips which to me is a no brainer. Don’t get me wrong, I like raisins, but I prefer the flavor of the chocolate chips mixed in with the oats and cinnamon. I’ve even seen recipes that call for Raisinets, which I think is BRILLIANT, but have yet to try it. If you have, let me know how they turned out!! (probably delicious).

I don’t know what I would do without my KitchenAid mixer. It was actually my 21st birthday gift hahaha…makes mixing up batter so much easier!


Once the batter was all mixed together, I made it rain……chocolate chips!!

Image


I use a cookie scoop for all my cookies so they come out even. I have two different scoop sizes, but tend to like cookies on the bigger side. I have been known to use an ice-cream scoop for certain cookie recipes!  

Image


Vanishing Oatmeal Raisin(or chocolate chip) Cookies

http://www.quakeroats.com/cooking-and-recipe/vanishing-oatmeal-raisin-cookies.aspx

INGREDIENTS:
1/2 Cup(s) (1 stick) plus 6 tablespoons butter, softened
3/4 Cup(s) firmly packed brown sugar
1/2 Cup(s) granulated sugar
2 Eggs
1 Teaspoon(s) vanilla
1-1/2 Cup(s) all-purpose flour
1 Teaspoon(s) Baking Soda
1 Teaspoon(s) ground cinnamon
1/2 Teaspoon(s) salt (optional) 
3 Cup(s) Quaker® Oats (quick or old fashioned, uncooked)
1 Cup(s) raisins 

PREPARATION:
Heat oven to 350°F. In large bowl, beat butter and sugars on medium speed of electric mixer until creamy. Add eggs and vanilla; beat well. Add combined flour, baking soda, cinnamon and salt; mix well. Add oats and raisins; mix well. Drop dough by rounded tablespoonfuls onto ungreased cookie sheets. Bake 8 to 10 minutes or until light golden brown. Cool 1 minute on cookie sheets; remove to wire rack. Cool completely. Store tightly covered.


These cookies are perfect for filling that empty cookie jar. The only hard part is trying not to sample them hot out of the oven, because I think these taste best when they have cooled completely, and of course served with a nice glass of cold milk!! 

Image


With love and sugar, Kristen xo.