Chocolate Chip Cookies

Chewy, crunchy, soft – no matter how you like them, I am pretty sure happiness is a plate full of chocolate chip cookies! So many different chocolate chip cookies that I love and the memories they hold like… the little pack of 3 Linden cookies that was often put in my lunch when I was going on a school field trip, or the box of Entenmann’s soft chocolate chip cookies that my grandparents would always make sure to have at their house, dipping Chips Ahoy in milk until they are just soft enough, right before they break off into the bottom of the milk, that lovely yellow roll of Nestle Tollhouse cookie dough that my mom always had on hand in a pinch — to my more grown-up taste buds of ginormous, gooey, chocolate chip cookies from Levain Bakery to crispy Tate’s cookies, which side note, were actually the first “gift” my husband ever got me while we were dating since he worked near the bakery and knew I loved them … no matter how you slice it, everyone has their favorite way (or in my case ways) to enjoy a chocolate chip cookie. If I had to choose a favorite– it would be, a crisp outside, but chewy inside, not too soft, not to crunchy, unless it’s Tate’s, those are the only crunchy chocolate chip cookies I reach for — and certain recipes, well, we just leave to the experts… So, overall I am team chewy…

If you’ve been following me, you know this is not the first chocolate chip cookie recipe I have posted. The first chocolate chip cookie recipe I shared can be found here , but let me say, it is definitely a time consuming recipe, but oh so worth it! When you do find yourself with the time, you should ABSOLUTELY try it, they are AWESOME! …but I don’t always have the time, or ingredients, to make those amazing cookies, so I would opt for the tried and true recipe on the back of the Nestle Toll House bag to fill my cookie jar… butttt I felt like changing it up and decided to look through my cookbooks to try a different recipe. I reached for the “Magnolia Table Vol.1” cookbook by Joanna Gaines and took a look at her recipe …First, let me just say like everything she does– it is so elegant and simple… the cookbook is so beautiful and I just love the rustic, farmhouse fell she was able to embody on cookbook pages– it’s amazing. I also love the stories that go along with her recipes. It’s what cooking is all about!

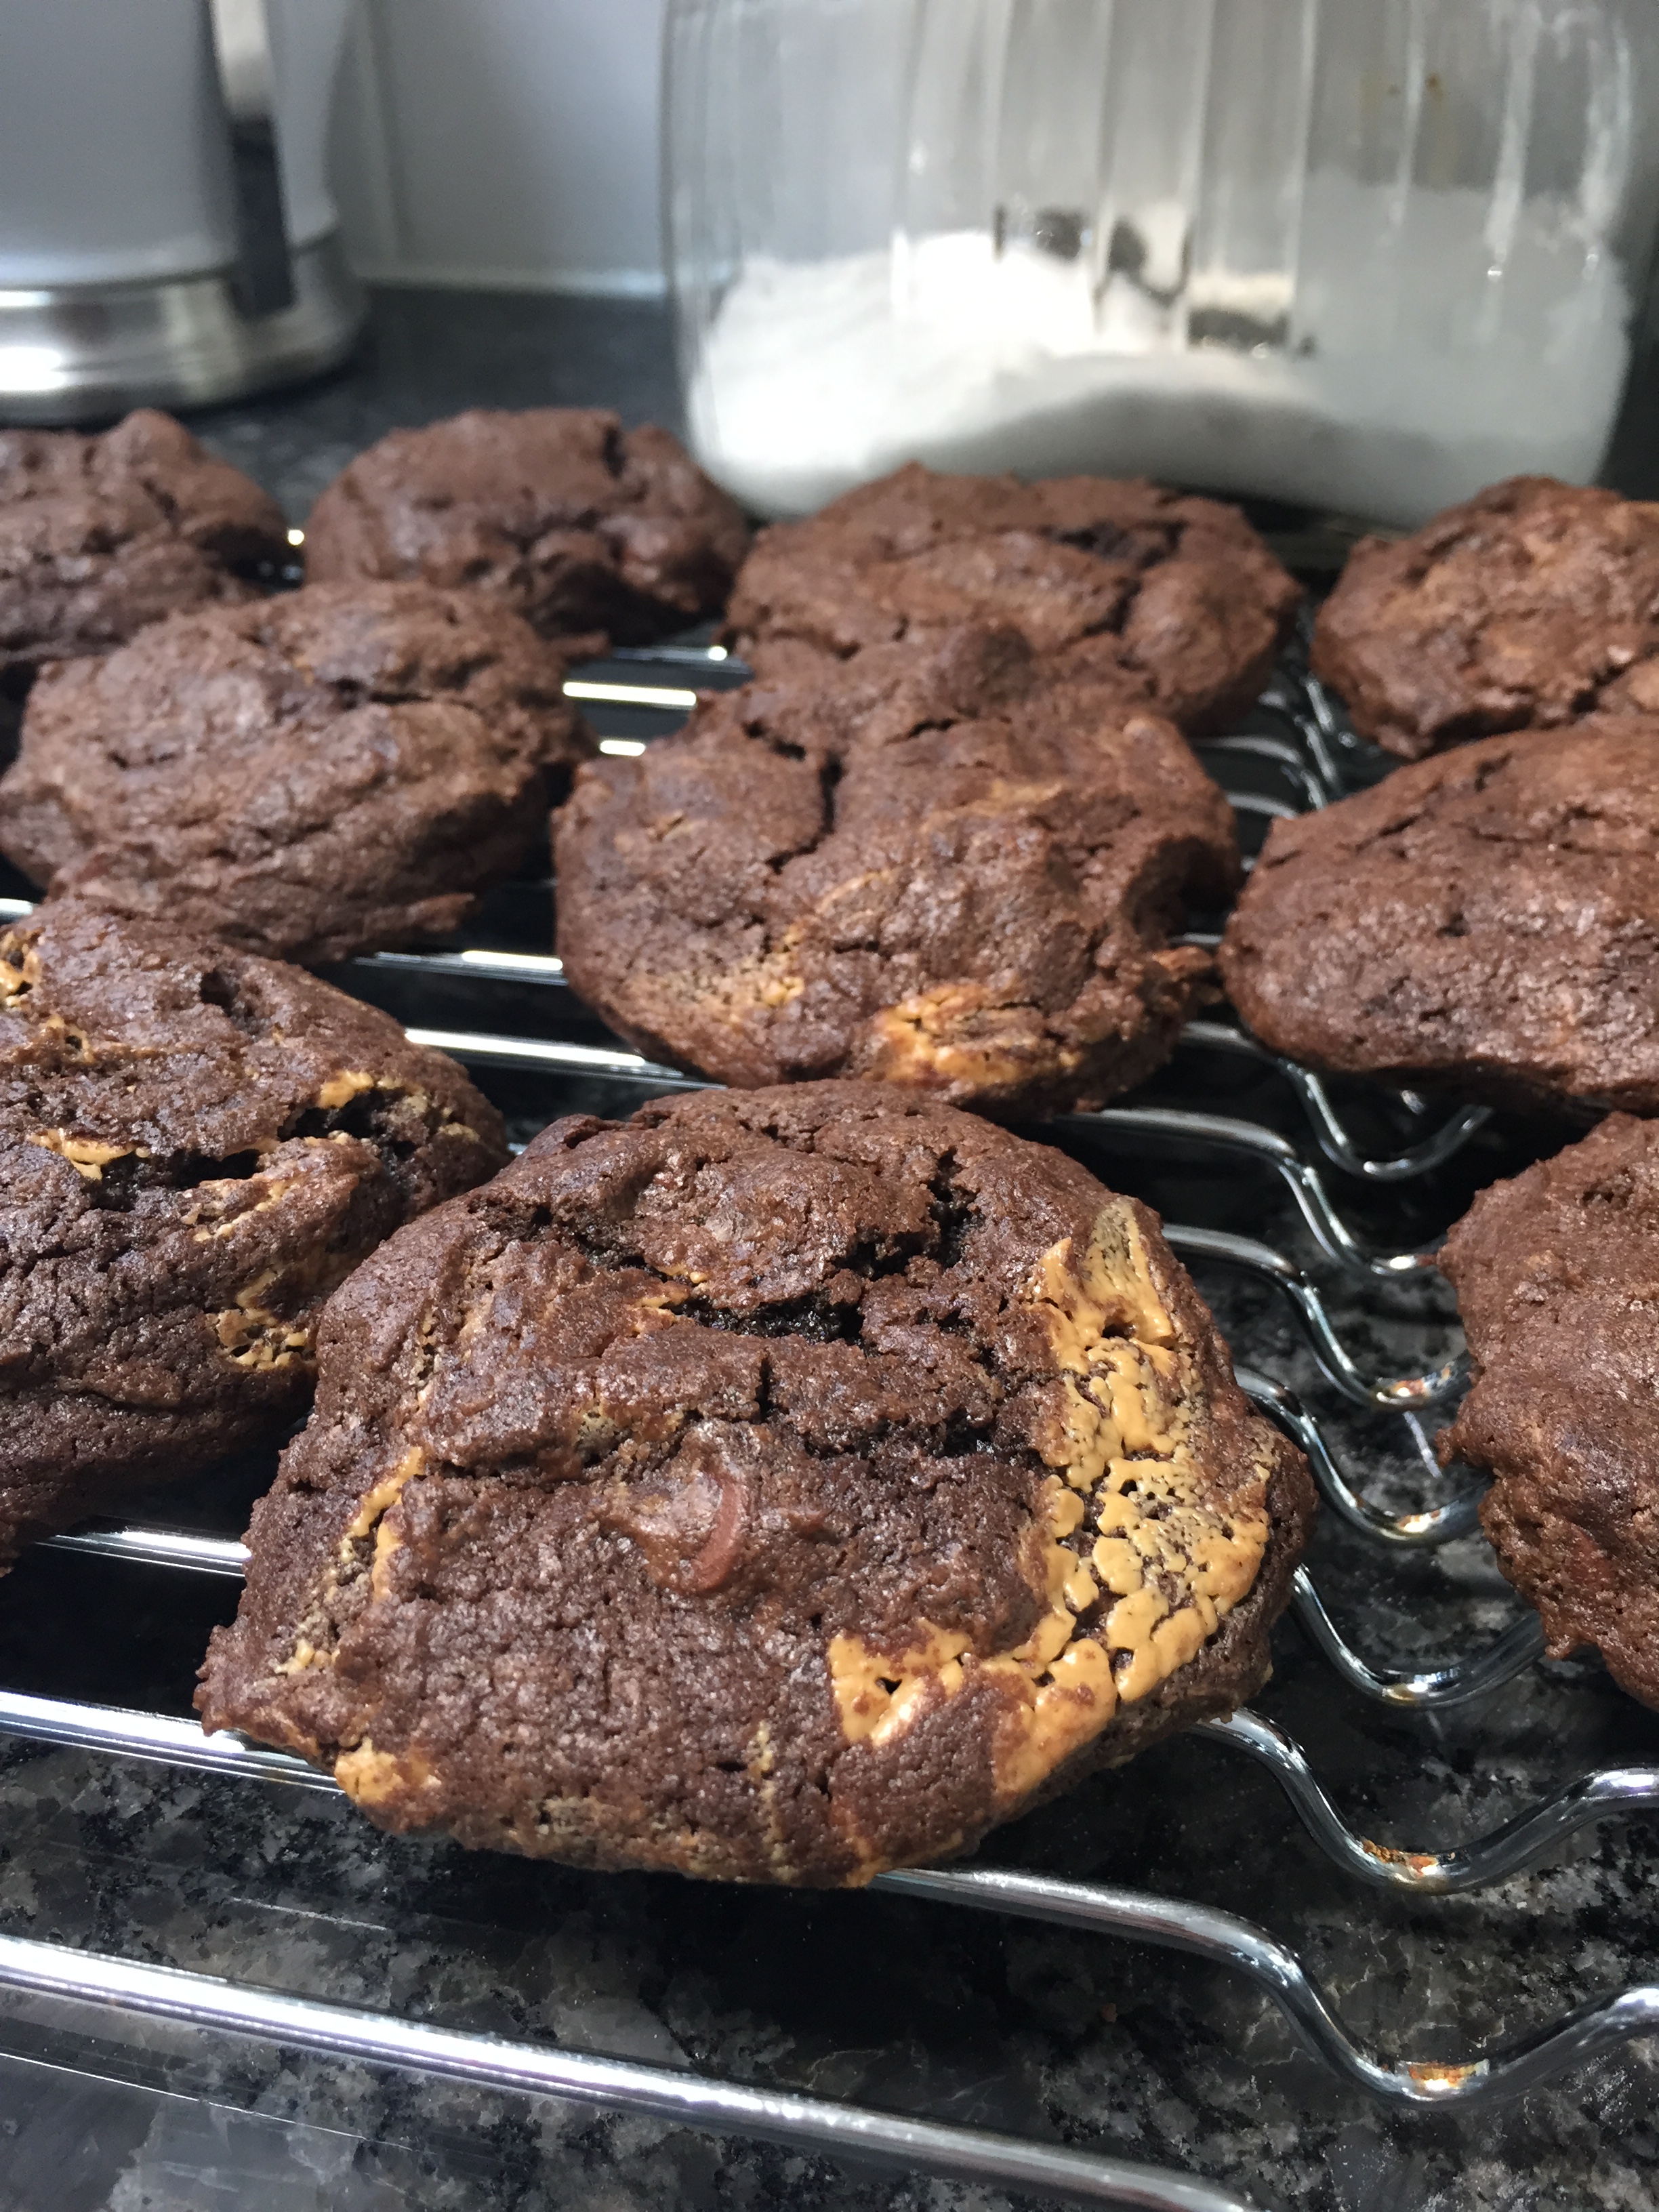
Verdict: My new go to chocolate chip recipe!! WOW!…you definitely do not miss the extra butter and the two cups of brown sugar gives these cookies that chewy-slightly crisp exterior that I love! Joanna also says you can use 2 cups of chocolate chips if you would like which I opted for since my husband has this thing with the proper chip to cookie ratio…they now have his seal of approval with the chocolate chip ratio and he now requests the “Joanna Chocolate chip cookies” on the regular.

Joanna Gaines’ Chocolate Chip Cookies

  • 2 1/2 cups all-purpose flour
  • 1 heaping teaspoon baking soda
  • 1/2 teaspoon sea salt
  • 8 tablespoons ( 1 stick ) unsalted butter, at room temperature
  • 2 cups packed light brown sugar
  • 2 large eggs
  • 1 1/2 teaspoons pure vanilla extract
  • 1 1/2 cups semisweet chocolate chips ( Joanna suggests that you can add an extra 1/2  of cup of sugar, which is did!)
  1. Position a rack in the center of the oven and preheat the oven to 350°. Line baking sheets with parchment paper.
  2. In a medium bowl, which together the flour, baking soda, and salt.
  3. In a mixer, beat butter and sugar on medium-high speed until light and fluffy, 2-3 minutes. Add the eggs and beat until blended. Add the vanilla and blend.
  4. Turn off mixer and add flour mixture to the bowl. Mix until incorporated; it will be chunky.
  5. Add the chocolate chips and beat on high for about 5 seconds to thoroughly mix the chips in.
  6. Drop by large spoonfuls on the lined baking sheet; don’t flatten them. Bake until lightly browned on top, 10 to 11 minutes. Cool on the pan on a rack for 1 minute, then transfer cookies to the rack to cool completely. Repeat with remaining dough.
  7. Store cookies in a tightly covered container at room temperature for up to 3 days.

Makes about 40 cookies 

I’m thinking of making a batch and sandwiching some Ice-Cream between them…I’ll let you know how that goes, or if you give it a try, report back! I’m sure the results would be awesome!!

With love and sugar, Kristen xo.


Homemade Pizza Dough

I would make homemade pizza dough with my Great Aunt Anna all the time! She didn’t measure anything or have a recipe. She just dumped some flour on the table, bloomed some yeast, mixed it all together, and then put it in a bowl to rise. Basically, she could do it with her eyes shut. Even though I did it with her all the time, I didn’t even know where to start when I wanted to try making my own pizza dough. Unfortunately, I never observed well enough to see exactly what she did and came to the upsetting realization that in the nearly 18 years that my Great Aunt is no longer with me– I have never tried to make my own pizza dough. Making this brought back some really happy memories and reminded me of why cooking is such a wonderful thing.

So, I went to Sally’s Baking Addiction and sure enough she had just what I was looking for. A recipe for a quick and easy pizza dough. This dough came together 1,2,3…and in a matter of minutes my dough was ready to rest. Remember, you will need to let the dough rest for at least an hour or two. You could also even make it the day before and let it rest overnight in the fridge.  I just posted the recipe below, but if you would like all of Sally’s tips and tricks…check out her post here. I highly recommend it!!

Honestly, there is nothing better than making dough from scratch. It’s easy, so delicious, and you know exactly what went into it. I also got to use my pizza stone for the first time which helped create an amazing crust. I do dream of visiting my favorite Pizza Shop in Soho again, but alas, we are still quarantined due to COVID-19 here…sooo those of you craving pizza, I’m telling you, THIS IS EASY TO DO! Go have some fun in the kitchen!  — crack open a bottle of wine… it’s the perfect night.

Homemade Pizza Dough (from sallysbakingaddiction.com)

  • 1 and 1/3 cups warm water (between 100-110°F)
  • 2 and 1/4 teaspoons yeast (1 standard packet)
  • 1 Tablespoon granulated sugar
  • 2 Tablespoons  olive oil
  • 3/4 teaspoon salt
  • 3 and 1/2 cups all-purpose flour, plus more for hands and surface
  • sprinkle of cornmeal for dusting the pan

Directions:

  1. Prepare the dough: Whisk the warm water, yeast, and granulated sugar together in the bowl of your stand mixer fitted with a dough hook or paddle attachment. Cover and allow to rest for 5 minutes.
  2. Add the olive oil, salt, and flour. Beat on low speed for 2 minutes. Turn the dough out onto a lightly floured surface. With lightly floured hands, knead the dough for 3-4 minutes. The dough can be a little too heavy for a mixer to knead it, but you can certainly use the mixer on low speed instead. After kneading, the dough should still feel a little soft. Poke it with your finger – if it slowly bounces back, your dough is ready to rise. If not, keep kneading.
  3. Lightly grease a large bowl with oil or nonstick spray– just use the same bowl you used for the dough. Place the dough in the bowl, turning it to coat all sides in the oil. Cover the bowl with aluminum foil, plastic wrap, or a clean kitchen towel. Allow the dough to rise at room temperature for 60-90 minutes or until double in size.
  4. Preheat oven to 475°F . Allow it to heat for at least 15-20 minutes as you shape the pizza. Lightly grease baking sheet or pizza pan with nonstick spray or olive oil. Sprinkle lightly with cornmeal, which gives the crust extra crunch and flavor. Highly recommended.
  5. Shape the dough: When the dough is ready, punch it down to release any air bubbles. Divide the dough in half. (If not making 2 pizzas, freeze half of the dough for another time– see freezing instructions below.) On a lightly floured work surface using lightly floured hands or rolling pin, gently flatten the dough into a disc. Place on prepared pan and, using lightly floured hands, stretch and flatten the disc into a 12-inch circle. Lift the edge of the dough up to create a lip around the edges.
  6. Cover dough lightly with plastic wrap or a clean kitchen towel and allow to rest for a few minutes as you prepare your pizza toppings.
  7. Top & bake the pizza: Top with your favorite toppings and bake for 12-15 minutes.
  8. Slice hot pizza and serve immediately.

with  love and sugar, Kristen xo.


Quinoa Enchilada Bake

Hi All! I hope you are all doing well and finding comfort with family during this time.

I am trying to be creative in the kitchen with cooking from my pantry and this meatless enchilada bake from SkinnyTaste fits the ticket.

I love veggies! I honestly can’t think of a veggie I don’t like or wouldn’t try.  I also love a good piece of meat or a nice juicy burger which is why when I try a meatless meal that packs tons of flavor and doesn’t make me miss the meat, I know it’s a keeper.

I am trying to incorporate more meatless meals that aren’t pasta in my daily dinner routine and using quinoa is always a good place to start.

…and incase quinoa isn’t your thing…I was scrolling back through the archives and noticed I have another meatless meal that you could give a try, that actually is another take on meatless enchiladas! It’s black bean, Swiss chard and butternut squash enchilada bake ! so yummy!

My meat loving husband loved this as well, but did say how good it would be if I put some chicken or shrimp with it haha …so however you choose to make it, I know you’re going to love it!

Below is the original recipe from the Skinny Taste web site. I didn’t have everything, so I just used what I had in my pantry — My version is in bold =)

Quinoa Enchilada Bake

  • 1/2 tsp. olive oil
  • 1 clove crushed garlic
  • cooking spray
  • 1 1/4 cups quinoa (rinsed and drained)
  • 1 8 oz can tomato sauce
  • 2 cups reduced-sodium chicken or vegetable broth
  • 1 1/2 teaspoons cumin
  • 1 tbsp chipotle en adobo sauce (or more) – I used a can of diced tomatoes instead
  • kosher salt and freshly ground black pepper (to taste)
  • 1 4 oz can diced green chiles – Didn’t have these, so I just omit it
  • 3/4 cup canned black beans (drained and rinsed)
  • 3/4 cup fresh or frozen thawed corn – Didn’t have corn
  • 1/4 cup chopped fresh cilantro (plus 2 tbsp for garnish)
  • 1 1/2 cups part-skim shredded Mexican cheese blend (divided*)
  • 1 medium (4 oz haas avocado, diced)
  • 2 tbsp chopped scallions
    ** Since I took out some of the spicy components, like the chipotle and green chilies, I added about 2 tbsp of chili powder which I always have ** 

Instructions

  1. Preheat the oven to 400°F. Lightly spray a 9 x 12 baking dish with oil.
  2. In a medium saucepan cook the quinoa with 1 3/4 cups broth according to package instructions; when cooked, fluff with a fork and set aside.
  3. Meanwhile in a small saucepan heat the oil over medium low heat. Add the garlic and saute until golden, about 1 – 2 minutes. Add the tomato sauce, 1/4 tsp kosher salt, cumin, 1/4 cup broth and chipotle en adobo. If it’s too thick, add 2 tbsp water to thin out. Bring to a boil and simmer 3 to 4 minutes. (This is to make the enchilada sauce, which I didn’t do — I just mixed everything and then baked )
  4. In a large bowl combine the cooked quinoa, green chiles, corn, black beans and 1/4 cup cilantro. Stir in 1/2 cup of the cheese and mix will. Place into the baking dish and spread out. Top with the enchilada sauce and remaining cheese.
  5. Cover with foil and bake until hot the cheese is melted, about 20 to 25 minutes.
  6. To serve, top with avocado, scallions and remaining fresh cilantro. Cut into 6 pieces and serve right away.

With love and sugar,

Kristen Xo.

Let’s ‘Ketch-Up’ + Bake Lemon Pound Cake

I know, I know…it’s been way too long, and honestly, I’ve started this post so many times, and still can’t figure out where or how to start or what to share first, so bear with me as we “Ketch-Up” …see what I did there? hahaha anywayyy…I do have a recipe to share in this post as well — a great lemon pound cake recipe from Sally’s Baking Addiction so read about what I’ve been up to and then go bake some pound cake!

  • Remember that really amazing boyfriend who bought me my first Le Creuset pot that I talked about in this post ? Well, he asked me to marry him in April of 2018!! I have a pretty awesome engagement story to fill you in on too!!


  • Following our engagement, we started planning a wedding and bought a house, so things got busy to say the least, but you can bet that food was a big priority in all of the planning which I hope to share as well!


  • I also started working in a new school district which has been fantastic!


  • Oh, and my husband ( gosh, I love saying that) and I traveled to Italy and Ireland for our honeymoon and ate to our hearts desire! I wish I had documented the food better, but I do have some tidbits to share! =)

So there you have it, I am getting myself back in the kitchen and have some great foodie finds to share as well! The first thing I baked in quite some time was this lemon pound cake from Sally’s Baking Addiction (She’s the best!) …and it was sooo yummy and easy…you probably have everything you need to make it right now which was another reason why I loved it!

img_1821

You can find her recipe here https://sallysbakingaddiction.com/iced-lemon-pound-cake/ I also wrote it out below. I followed it exactly and thought about maybe not icing it, but let’s be honest, who doesn’t want icing and in my opinion the icing made it!

Iced Lemon Pound Cake (Sally’s Baking Addiction)

Ingredients

1 1/2 cups all purpose flour

1/2 teaspoon baking powder

1/2 teaspoon salt

3/4 unsalted, room temperature butter

1 cup granulated sugar

3 large eggs, at room temperature

1/4 cup sour cream, at rom temperature

3 tablespoons, freshly squeezed lemon juice ( about 1 lemon)

zest of 1 lemon

1 teaspoon pure vanilla extract

Lemon Icing 

1 cup confectioners’ sugar, sifted

1  1/2 Tablespoons  lemon juice

1 Tablespoon heavy cream or milk

Directions

  • Lower the oven rack to the lower third position and preheat the oven to 350°F (177°C). Grease a 9×5 inch loaf pan.
  • Make the cake: Whisk the flour, baking powder, and salt together in a large bowl. Set aside.
  • With a handheld or stand mixer fitted with a paddle or whisk attachment, beat the butter on high speed in a large bowl until smooth and creamy, about 1 minute. Add the granulated sugar and beat on high speed for 2 minutes until creamed. Scrape down the sides and up the bottom of the bowl as needed.
  • With the mixer running on low speed, add the eggs one at a time, then beat in the sour cream, lemon juice, lemon zest, and the vanilla extract. Beat on medium-high speed until combined. Scrape down the sides and up the bottom of the bowl as needed. With the mixer running on low speed, slowly add the dry ingredients just until combined. Turn the mixer up to high speed and beat for 10 seconds to rid any large lumps. Do not overmix.
  • Pour the batter into prepared loaf pan and bake for 45 minutes to 1 hour. Pound cakes are dense and, therefore, take awhile in the oven. This takes about 48 minutes in my oven. Baking times vary, so keep an eye on yours. The cake is done when a toothpick inserted in the center comes out mostly clean. A couple moist crumbs may remain.
  • Remove the cake from the oven and set on a wire rack. Allow to cool for 1 hour, then carefully remove from the loaf pan.
  • Make the icing: Whisk all of the icing ingredients together and pour over slightly warm cake. Allow cake to cool completely before serving.
  • Cover and store leftover cake at room temperature for up to 5 days.


With love and sugar,

Xo. Kristen


Twenty Twenty

Happy Belated New Year! A lot has happened since my last post, I mean A LOT! …I got a new job, engaged, bought a house, and planned a wedding!! I hate to admit, but this is not the first time I have gone many, many months without posting and I am working on changing that in this new year so I hope you will continue to check in and see what I am up to in the kitchen!

pexels-photo-3401900.jpeg

Photo by cottonbro on Pexels.com

Love and Sugar,

Kristen xo.

Donuts, Get Your Donuts!

As many of you reading this know, I will travel for food. Whether it’s a car ride or a plane ride, there’s always some food destination on my list. So, today I have a fun food destination that I want to share.

A few weeks ago I was scrolling through my Instagram and up popped a picture of these delicious looking donuts. Naturally, I clicked to check it out and was thrilled to learn that the donut shop was located right here on Long Island!!! Finally!!!! A DONUT SHOP HAS ARRIVED!! So, yesterday morning I ventured out to Port Jefferson to check out the new donut shop, East Main and Main.

I knew I was going to love the place before even walking in because there was a pink donut hanging from the tree outside to denote where the shop was. I loved the rustic look of the store and was immediately greeted with a friendly hello. The display counter of donuts looked spectacular! I didn’t even know where to begin…

IMG_0054

They have certain flavors everyday as well as specialty donuts that change daily. I decided to order the Peanut Butter Cup, S’mores, Cookies and Cream, Fig, Toffee, Key Lime, Cereal topped, and Lemon Blueberry donuts.  The store was so cozy and welcoming that I decided to take advantage of the seating they provide, ordered a cup a of coffee, and began to dig in to some of these donuts! I couldn’t wait!!!

IMG_0055

WOW!!! they were TO DIE FOR! Big and flavorful with a delicious dough that is only enhanced by the yummy toppings and fillings of each one. I think my favorite would have to be the Lemon Blueberry, but for the chocolate lover in me, the Peanut Butter cup was amazing! Oh, and for those of you who like figs (I happen to love them!)…The Fig with Mascarpone was awesomeee!!! Keep in mind that some of these flavors are not always available, but I don’t think you’ll have a hard time finding one that is delicious on the day you decide to make a visit!!

I ate my fair share of donuts yesterday and can’t wait to go back and try more!

So, if you find yourself walking around town in Port Jeff and see a pink donut hanging from a tree, STOP!!! and check out East Main and Main, you can thank me later!  ; )

With love and sugar,

xo. Kristen

Short Rib Sunday!

dsc_1556

It was a nice, relaxing Sunday over here and short ribs were on the menu.  One of my favorite restaurants serves a braised pot roast over polenta that is to die for!!! So, I figured why not use some short ribs instead, right? and that’s what I did. I made some Braised Short Ribs with Parmesan Polenta and for some greens – a side of  broccoli rabe. Oh my goodness do I love broccoli rabe!

The first recipe I came across for braised short ribs was from Williams Sonoma. I took a closer look and immediately knew that this was the recipe I was going to use. Not only was it exactly what I had in mind when I envisioned this meal, but the other great thing about this recipe was that I already had most of the ingredients on hand! Score!

Keep in mind that this recipe does need a bit of tender love and care so I recommend making it when you know you’ll be hanging around the house.  I also halved the recipe since it was only for my boyfriend and I – who so kindly took the pictures since he has some pretty sweet camera skills. Say goodbye to iPhone pictures haha… You guys, how good does this look right? My mouth is watering…go make this!!! Simple ingredients, and big on flavor! The meat was fall-off-the-bone tender and the grave was just heavenly. You’ll want to be pretty generous with it when serving, so good! We loved it!!

Braised Short Ribs with Creamy Polenta

http://www.williams-sonoma.com/recipe/braised-short-ribs-with-creamy-polenta.html

Ingredients:
3 Tbs. olive oil
6 lbs. meaty, bone-in, individual-cut short ribs
4 tsp. kosher salt
1 tsp. freshly ground pepper
1 yellow onion, chopped
2 carrots, diced
6 cloves garlic, chopped
1/3 cup all-purpose flour
2 cups hearty red wine
3 cups beef stock or broth
2 Tbs. tomato paste
1 Tbs. minced fresh rosemary
1 bay leaf
1 cup whole milk  (I used chicken broth) 
1 1/3 cups quick-cooking polenta
1/2 cup freshly grated Parmigiano-Reggiano, plus more for serving

Directions:
Preheat an oven to 325°F. In a Dutch oven, heat 2 Tbs. of the oil over medium-high heat. Season the short ribs with 2 tsp. salt and the pepper. In batches to avoid crowding, add the short ribs to the pot and cook, turning occasionally, until browned on all sides, 5 to 6 minutes per batch. Transfer to a plate.

Add the remaining 1 Tbs. oil to the pot and heat. Add the onion and carrots and cook, stirring occasionally, until the onion softens, about 5 minutes. Stir in the garlic and cook until fragrant, about 1 minute. Sprinkle in the flour and stir well. Slowly stir in the wine, then the stock. Stir in the tomato paste, rosemary and bay leaf. Return the short ribs to the pot. The short ribs should be barely covered with liquid. If not, add hot water as needed. Bring the liquid to a boil. Cover the pot, place in the oven, and cook, moving the position of the ribs every 45 minutes or so to be sure that they are covered with liquid and are cooking evenly, until very tender, about 2 1/2 hours. Transfer the ribs to a deep serving platter (don’t worry if the meat separates from the bones), and tent with aluminum foil to keep warm.

Let the cooking liquid stand for 5 minutes. Skim off the fat from the surface and discard. Bring to a boil over high heat. Cook, stirring, until reduced by about one-fourth, about 10 minutes. Discard the bay leaf. Return the short ribs to the pot.

Just before serving, make the polenta: In a heavy saucepan, bring 3 cups water, the milk, and the remaining 2 tsp. salt to a boil over high heat. Slowly whisk in the polenta and reduce the heat to medium-low. Cook, whisking often, until the polenta is thick, about 2 minutes. Stir in the 1/2 cup Parmigiano-Reggiano. Divide the polenta among warmed deep serving bowls, top with the ribs and sauce and serve at once. Serves 6.

Oh! and don’t forget the broccoli rabe – Here’s how I made it… Trim the bottom stems and then in batches, drop it in boiling water for 1 minute and then transfer it to a bowl of ice water to cool. I then sautéed it with a little olive oil, garlic and some red pepper flakes until tender, about 4-5 minutes. Doesn’t get much easier than that, yummm!

With Love and Sugar,

Kristen xo.


Black Bean, Swiss Chard and Butternut Squash Enchiladas!

Fall is here!! Time for cool weather, fall foliage and warm, cozy kitchens filled with the aromas of comfort food and fresh baked goodies!! First recipe up…Black Bean, Kale and Butternut Squash Enchiladas.

So as the summer was coming to an end, a friend of mine dropped off some goodies from their garden, including the cutest butternut squash. It sat for days until I came across the perfect recipe…Black Bean and Butternut Squash Enchiladas!!!!! I decided to add the Kale to the recipe I had found simply because I had seen other recipes with it so I decided to add it to this one.

I was really excited to make this for many reasons. The first being that Mexican food is one of my all time favorite cuisines and the second being that this recipe is layered like a lasagne instead of rolling it into individual enchiladas which made it an easy week night meal. I was also left with plenty of leftovers to bring for lunch which is an added bonus! I decided to use jarred Enchilada sauce (Frontera)  since I was making it during the week, but had I been making this on the weekend I totally would have made my own.

I also roasted my butternut squash in the oven first before making the mixture on the stove. I just like the extra flavor. All you need to do is drizzle the butternut squash with olive oil, season, and put in the 400 degree oven for about 30 minutes. Which would cut the simmering time in the recipe below since the squash would already be cooked. This was a great meatless meal. Filling and Satisfying!

Black Bean, Swiss Chard, and Butternut Squash Enchiladas 

*recipe adapted from http://littlespicejar.com/butternut-squash-black-bean-enchilada-casserole/

INGREDIENTS
1 tablespoon olive oil
1 medium onion, chopped
1 tablespoon minced garlic
1 jalapeño, diced (with seeds and ribs removed, optional)
3 cups butternut squash, peeled and diced
1¼ cup salsa
¼ cup chopped cilantro + plus more for serving
½ teaspoon red chili powder
1 teaspoon cumin powder
½ teaspoon coriander powder
1 bunch of swiss chard, thinly sliced
¼ cup water
1 (15 oz can) black beans, drained and rinsed
1½ cups red enchilada sauce (homemade or store bought)
6 tortillas, cut into 1inch thick strips
1½ cups monterey Jack or cheddar cheese
salt and pepper, to taste

3 chives, thinly sliced
sour cream, to serve
INSTRUCTIONS
1. Heat the olive oil over medium high heat in a large skillet. Add the onions jalapeños and cooke for 4-5 minutes until the onions become translucent, add the garlic and continue to cook for an additional 1 -2 minutes. Add the cubed butternut squash, salsa, cilantro, chili powder, cumin, coriander, water, swiss chard and season with salt and pepper to taste. Cover and let cook over medium-low heat for about 25-30 minutes or until the squash is tender. Add the black beans and stir to combine ( lessen your cooking time if you’ve already roasted the squash in the oven first).

2. Position a rack in the center of the oven and preheat the oven to 400 degrees F.
Place a ¼ cup of enchilada sauce on the bottom of a large baking dish. Lay enough tortilla strips side by side to cover the surface. Place half of the filling over the tortilla layer, top with half of the remaining enchilada sauce and then half of the cheese. Repeat a second layer of tortillas, then the remaining butternut squash mixture, followed by the remaining enchilada sauce and finally layer on the remaining cheese.

3. Bake the enchilada casserole or 10 – 15 minutes or until the cheese melts. Top with scallions and additional chopped cilantro. Serve with sour cream, if desired.

…a little Guacamole and brown rice on the side wouldn’t hurt either! =)

With love and sugar, Kristen x0.

PS- I have a really yummy pasta dish to share up next! Keep a look out…


A Surprise Gift + Risotto

This awesome Le Creuset Pot was a very special gift from my boyfriend and there’s a super cute story that goes along with it. He was going away for the weekend and dropped this off on a Thursday night and I was told I could not open it until Saturday which was a special day for us, hence the gift giving haha (how awesome is he, right?). I had to walk past this box sitting neatly wrapped on my dining room table for two days!! – the suspense was killing me! Well, I asked if Friday at midnight counted as Saturday and he laughed and said yes, I could open it then. It was literally 12:00am on the dot when I tore off the wrapping paper to reveal this beauty…

IMG_0940

Ohh my gravy!!! I have been wanting a La Creuset pot since like forever!! He’s the best! =)

I couldn’t wait to use it … Since receiving this pot, I have used it for just about everything, but the very first thing I used it for was to make risotto.

As always, I looked through my Giada cookbook for the recipe and once again it did not disappoint. It was easy, delicious and boyfriend approved. If you are nervous to make risotto, don’t be! It does take some tender love and care, but it is so worth it! So what are you waiting for? =)

IMG_0959

Mushroom and Pea Risotto

Ingredients

8 cups canned low-salt chicken broth
1/2 -ounce dried porcini mushrooms
1/4 cup unsalted butter
2 tablespoons olive oil
2 cups finely chopped onions
10 ounces white mushrooms, finely chopped
2 garlic cloves, minced
1 1/2 cups Arborio rice or short-grain white rice
2/3 cup dry white wine
3/4 cup frozen peas, thawed
2/3 cup grated Parmesan
Salt and freshly ground black pepper, optional

Bring the broth to a simmer in a heavy medium saucepan. Add the porcini mushrooms. Set aside until the mushrooms are tender, about 5 minutes. Keep the broth warm over very low heat.

Melt the butter in a heavy large saucepan over medium heat. Add olive oil. Add the onions and saute until tender, about 8 minutes. Add the white mushrooms and garlic. Using a slotted spoon, transfer the porcini mushrooms to a cutting board. Finely chop the mushrooms and add to the saucepan. Saute until the mushrooms are tender and the juices evaporate, about 5 minutes. Stir in the rice and let it toast for a few minutes. Add the wine; cook until the liquid is absorbed, stirring often, about 2 minutes. Add 1 cup of hot broth; simmer over medium-low heat until the liquid is absorbed, stirring often, about 3 minutes. Continue to cook until the rice is just tender and the mixture is creamy, adding more broth by cupfuls and stirring often, about 28 minutes (the rice will absorb 6 to 8 cups of broth). Stir in the peas. Mix in the Parmesan. Season with salt and pepper, to taste.

Read more at: http://www.foodnetwork.com/recipes/giada-de-laurentiis/mushroom-risotto-with-peas-recipe.html?oc=linkback

With love and sugar, Kristen xo.

Chocolate Peanut Butter Swirled Cookies

Yes, you read that right – Chocolate Peanut Butter SWIRLED Cookies!!! …I hope I’m not the only one who has thousands upon thousands of pinned recipes on Pinterest and then don’t make any of them (Yup – GUILTY!) … but when I pinned this cookie recipe I knew that I needed to make it immediately. Typically, cookies are not a summer treat because it involves turning the oven on, but I didn’t care. There was chocolate and peanut butter involved. done.

I stumbled upon this recipe one July afternoon and knew I needed to make these, which was then reaffirmed once the batter came together. I knew this was a recipe I had to share after not blogging for months (and I mean months, sorry y’all)…that’s all I’m going to say because if I make you read any longer I’m only keeping you from getting in the kitchen and making these bad boys, so go, like now, I’m not kidding … you’ll thank me later! =)

Chips upon Chips...YES!

Chips upon Chips…YES!

Chocolate Peanut Butter Swirled Cookies

http://www.cookingactress.com/2015/07/peanut-butter-swirled-chocolate-cookies.html

IMG_0659

Makes approx. 3 dozen cookies.
Ingredients:
1 cup creamy peanut butter (or chocolate peanut butter–natural, homemade, or storebought are all fine)
2 sticks (or 16 tbsp. or 1/2 lb.) butter, softened
3/4 cup granulated sugar
1 cup light brown sugar, packed
2 eggs
1 tbsp. vanilla extract
1 and 3/4 cup all purpose flour
1 tsp. baking soda
1/2 tsp. kosher or sea salt
1 cup cocoa powder
2 cups chocolate chunks or chips (dark or semisweet are best)

Preparation:

  • Preheat oven to 350F degrees. Line a large baking sheet with parchment paper or silicone baking mat.
  • Freeze peanut butter for about 30 minutes, until firm.
  • Using a mixer (hand or stand) cream together the butter and sugars until light and fluffy.
  • Beat in eggs and vanilla until combined.
  • Add flour, baking soda, salt, and cocoa powder and mix on low speed until just combined.
  • Add chocolate chunks/chips and mix in until evenly incorporated.
  • Drop in dollops of chilled peanut butter and just mix a few times so that it is swirled throughout the dough.
  • Use a medium cookie scoop to measure dough onto cookie sheet, leaving at least 1 inch of space between each dough ball. (You’ll need to do a few batches to use up all the dough.)
  • Bake 14-16 minutes, until set. Cool on baking sheet for 5 minutes before transferring to a wire rack to cool completely.
  • Repeat until all the dough is used up.
  • Serve warm! Store leftovers in airtight container at room temperature for up to 1 week or freeze in freezer bags for up to 3 months.

With love and sugar, Kristen xo.