Happy New Year! Hope 2015 is treating you all well!
I’m not sure if there is any place better than New York during the holidays. Ever since I was little my parents would take my brother and I to Manhattan to soak in all the sites and eats of one of the greatest cities…such great memories!!! That tradition has not stopped and we continue to frequent the city as often as possible. In fact, my mom’s gift of choice are tickets to the theater, so this year for Christmas we got her, what else? tickets to a show and spend the weekend in Manhattan!!

Love My City!
So, naturally, my job was to pick where we would be having dinner. The dining options in NYC are endless, and I am not even close to trying all the city has to offer. I have some favorites that we frequent, but I decided to look through my list of places on my “must eat in NYC” list to try something new and stumbled upon BLT Steak. I had added this restaurant after seeing a segment on Best Thing I Ever Ate when Tyler Florence mentioned their amazingly, delicious Popovers that they bring to your table along with a cute tag that has the recipe!! Reservations, check!!!
Let me first start off by saying that not only was the food absolutely delicious, but the staff made the experience truly the most memorable dinning experience I’ve ever had, ever! period. From the minute we walked in the door we were greeted with such warmth and hospitality that I felt like I was dining at a friends house.
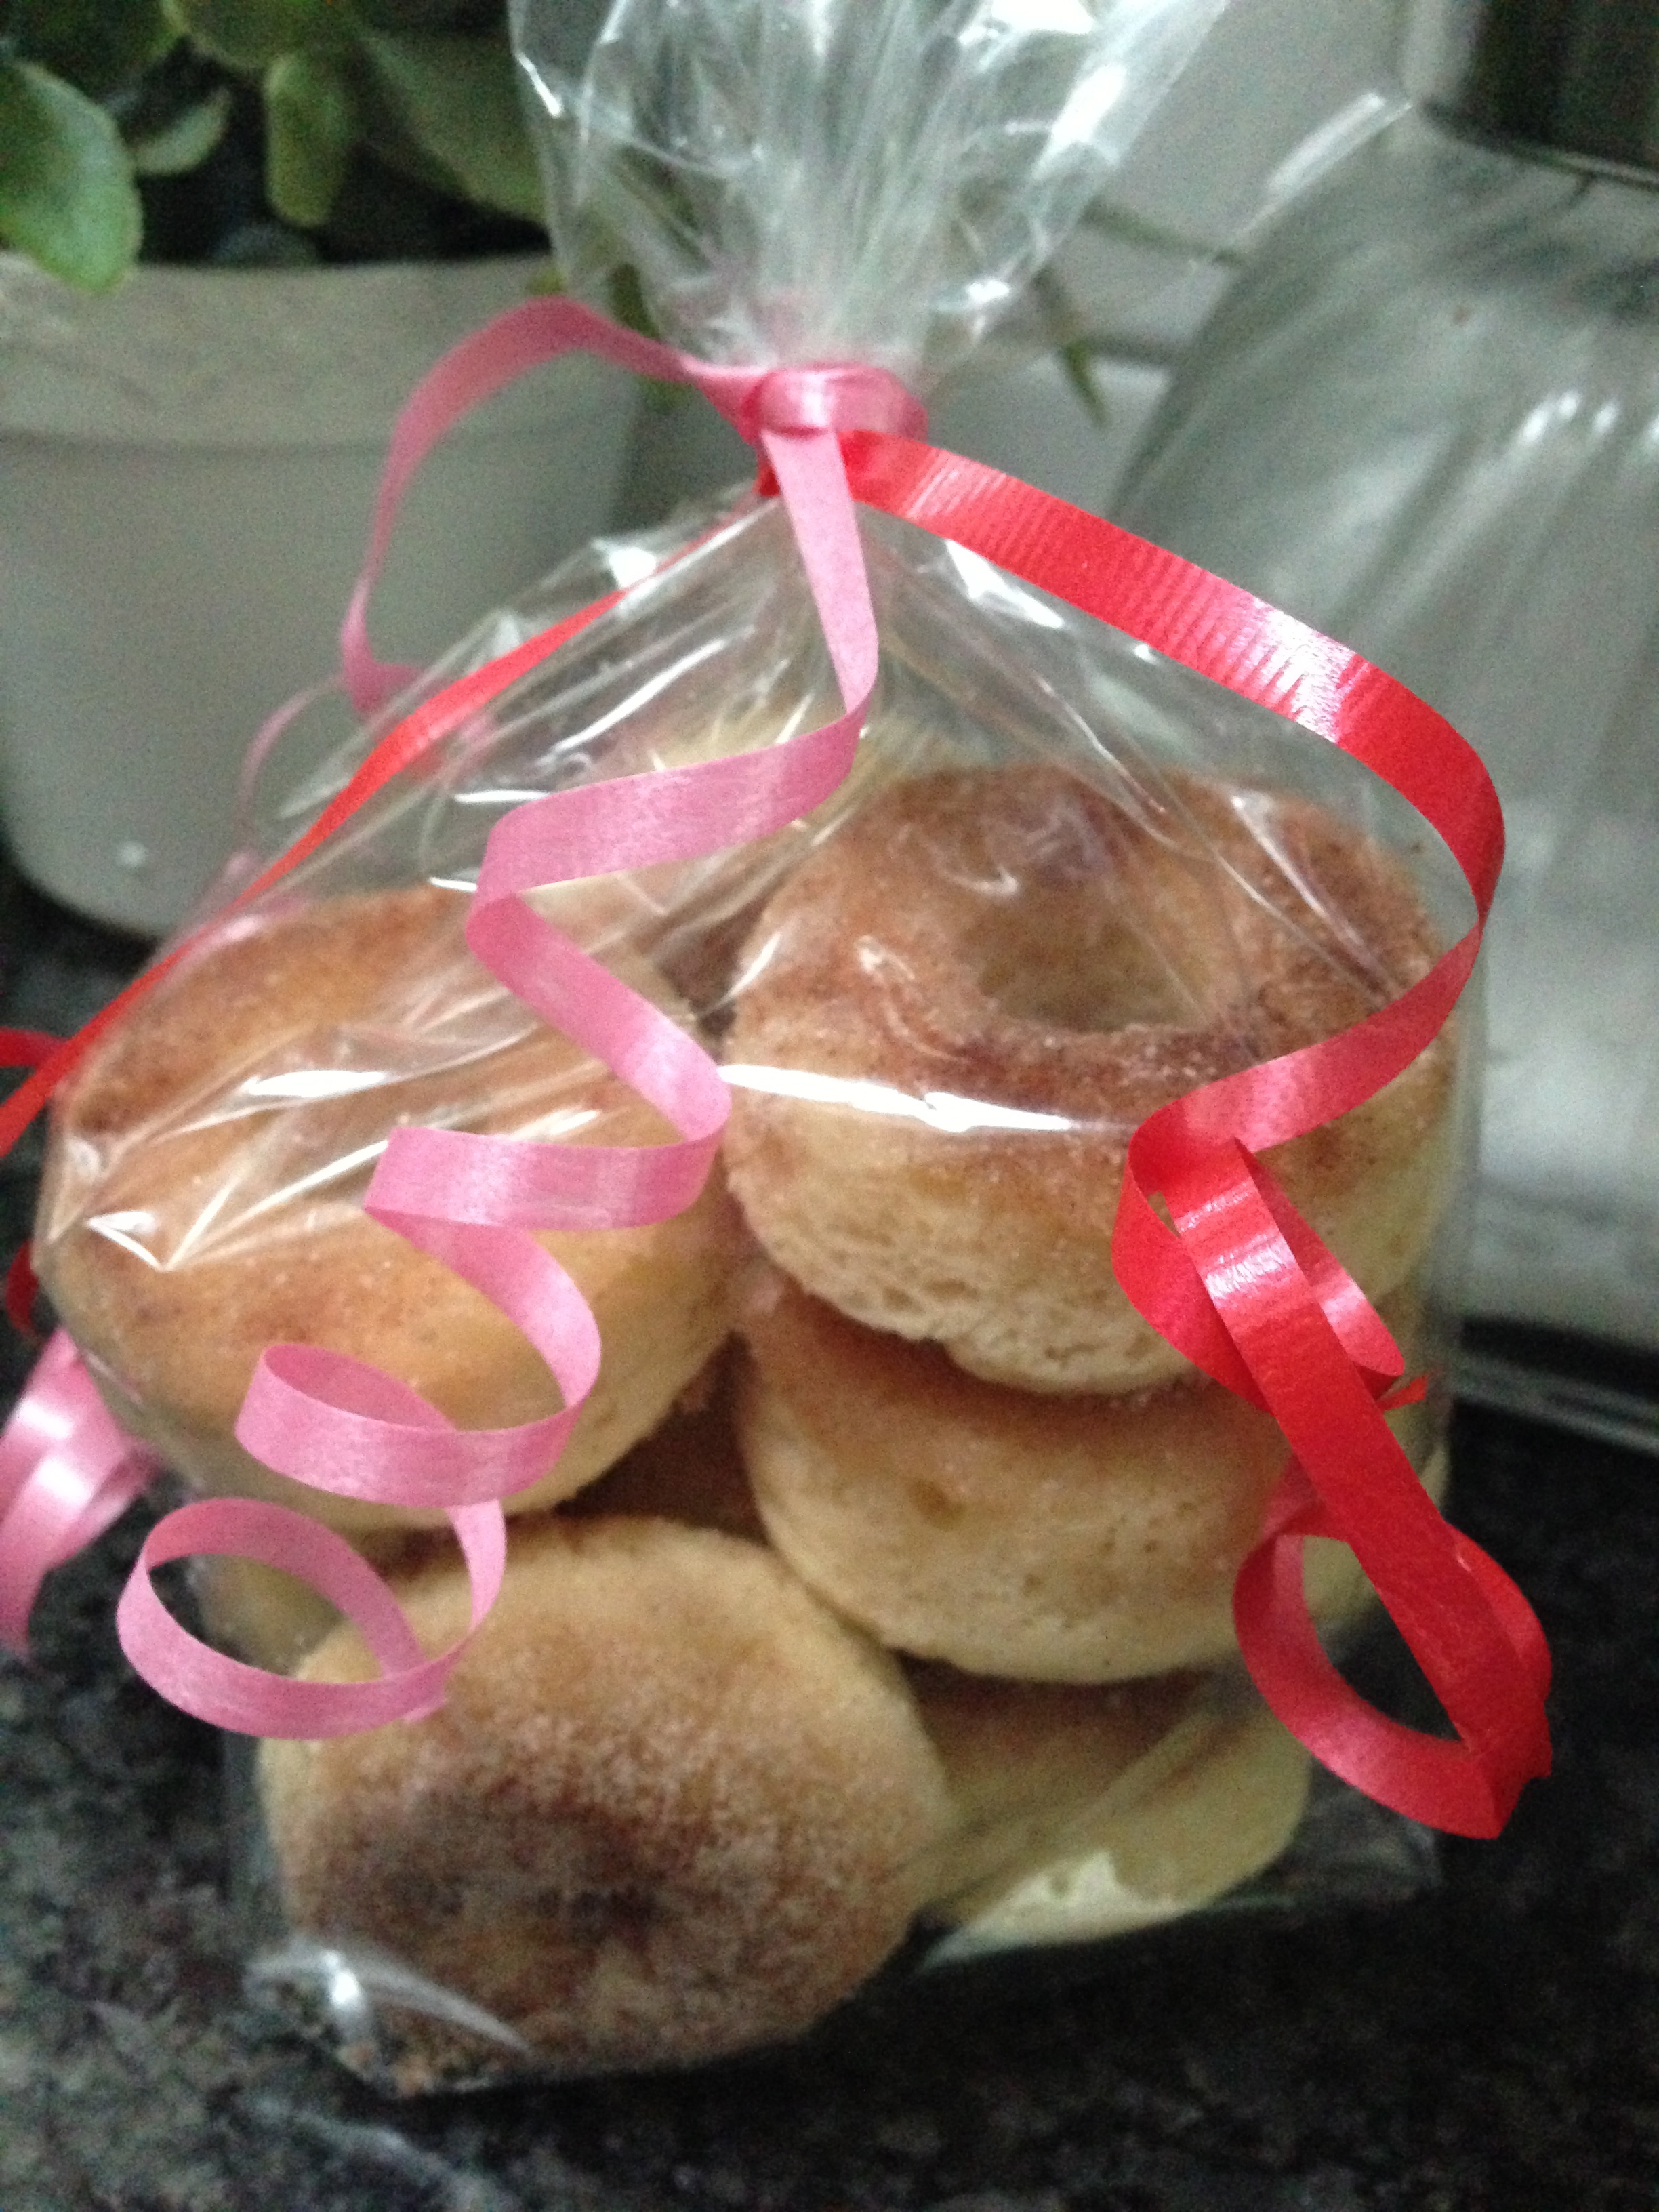
Once we placed the order for our entrees, my eyes quickly darted to a tray of these beautiful, flaky, piping hot, Pop Overs which were being placed on the table with butter and the cutest salt shaker…OMG…you guys…you need these in your life!!! Better than any bread basket…and it comes with the recipe!!! amazing…Tyler Florence knows what’s up!

Popovers…comin’ in hot!!
We then had the beet salad with gorgonzola and apples, which was light and delicious!

Beet Salad
For our entrees, I ordered the branzino, which was fabulous, mom had the hanger steak, the meat was so incredibly flavorful, and dad ordered short ribs, which were fork tender. The side dishes were equally as yummy — The mashed potatoes are out of this world!! The Mac and Cheese was a special and I probably could have had about 7 more orders of it, and I know you are thinking that mushrooms sound boring, but oh no, not these! They were meaty and flavorful and the perfect side dish to accompany the meal.

Branzino

Prime Hanger Steak
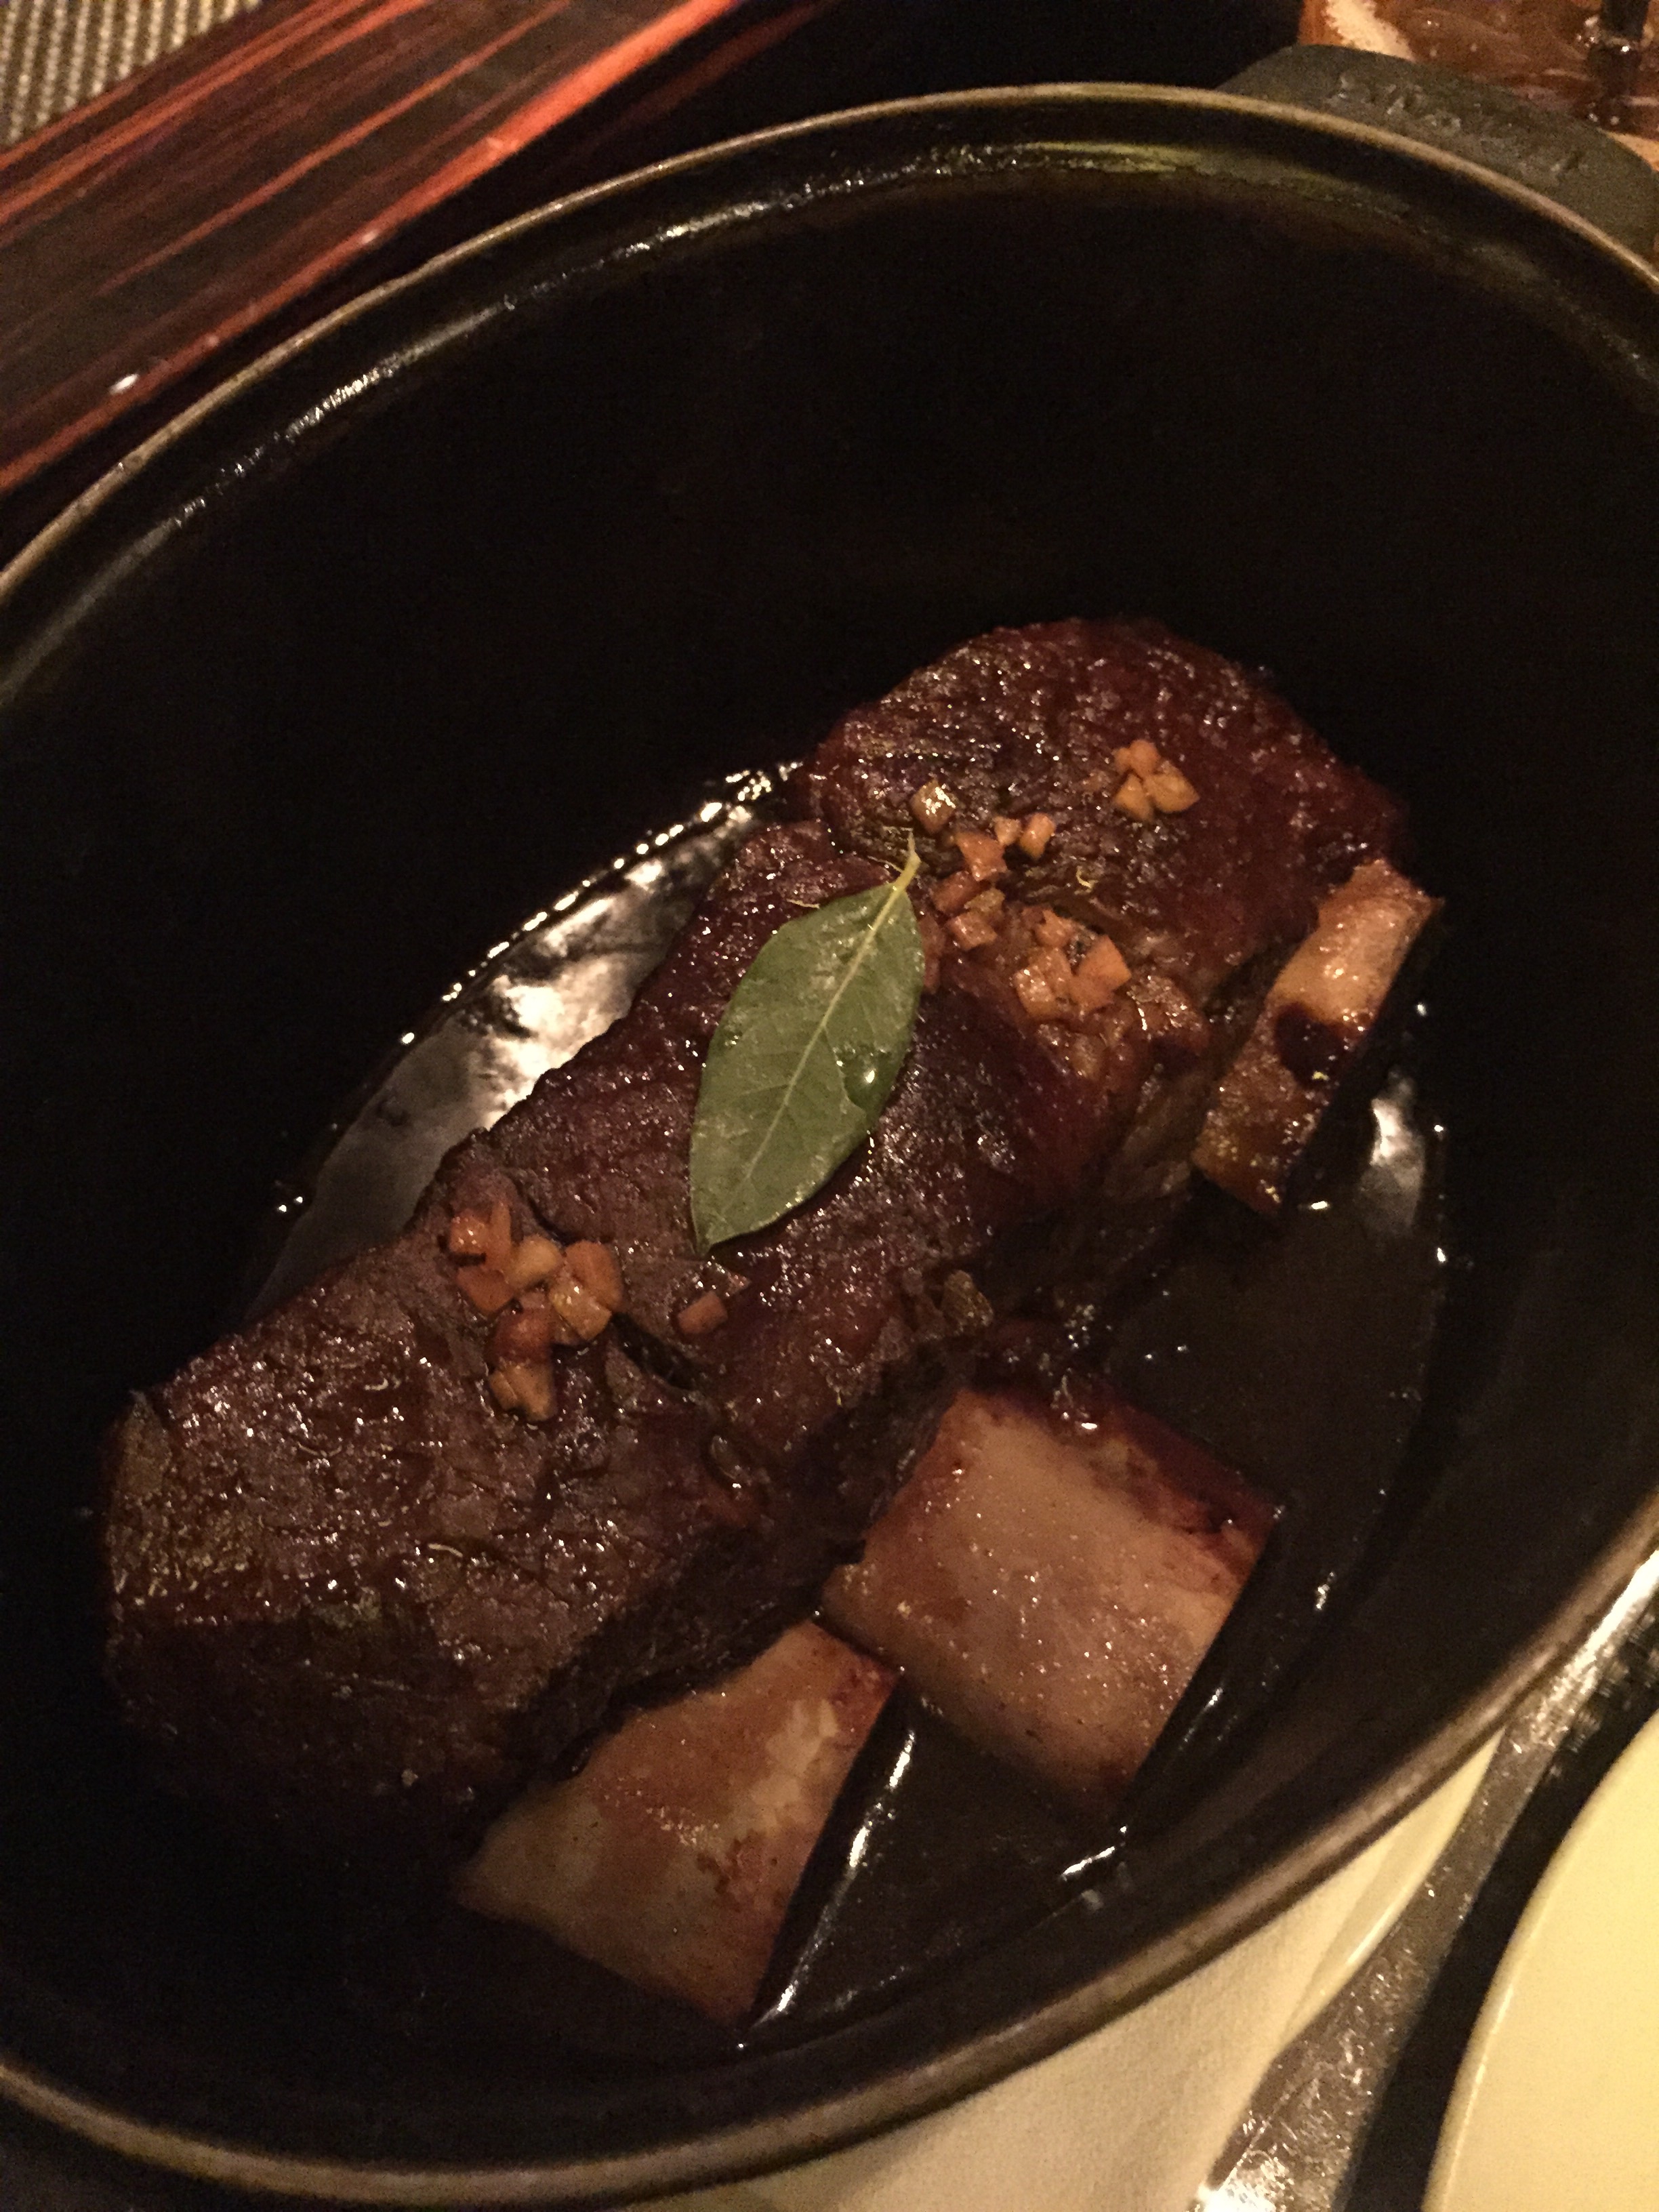
Braised Short Ribs
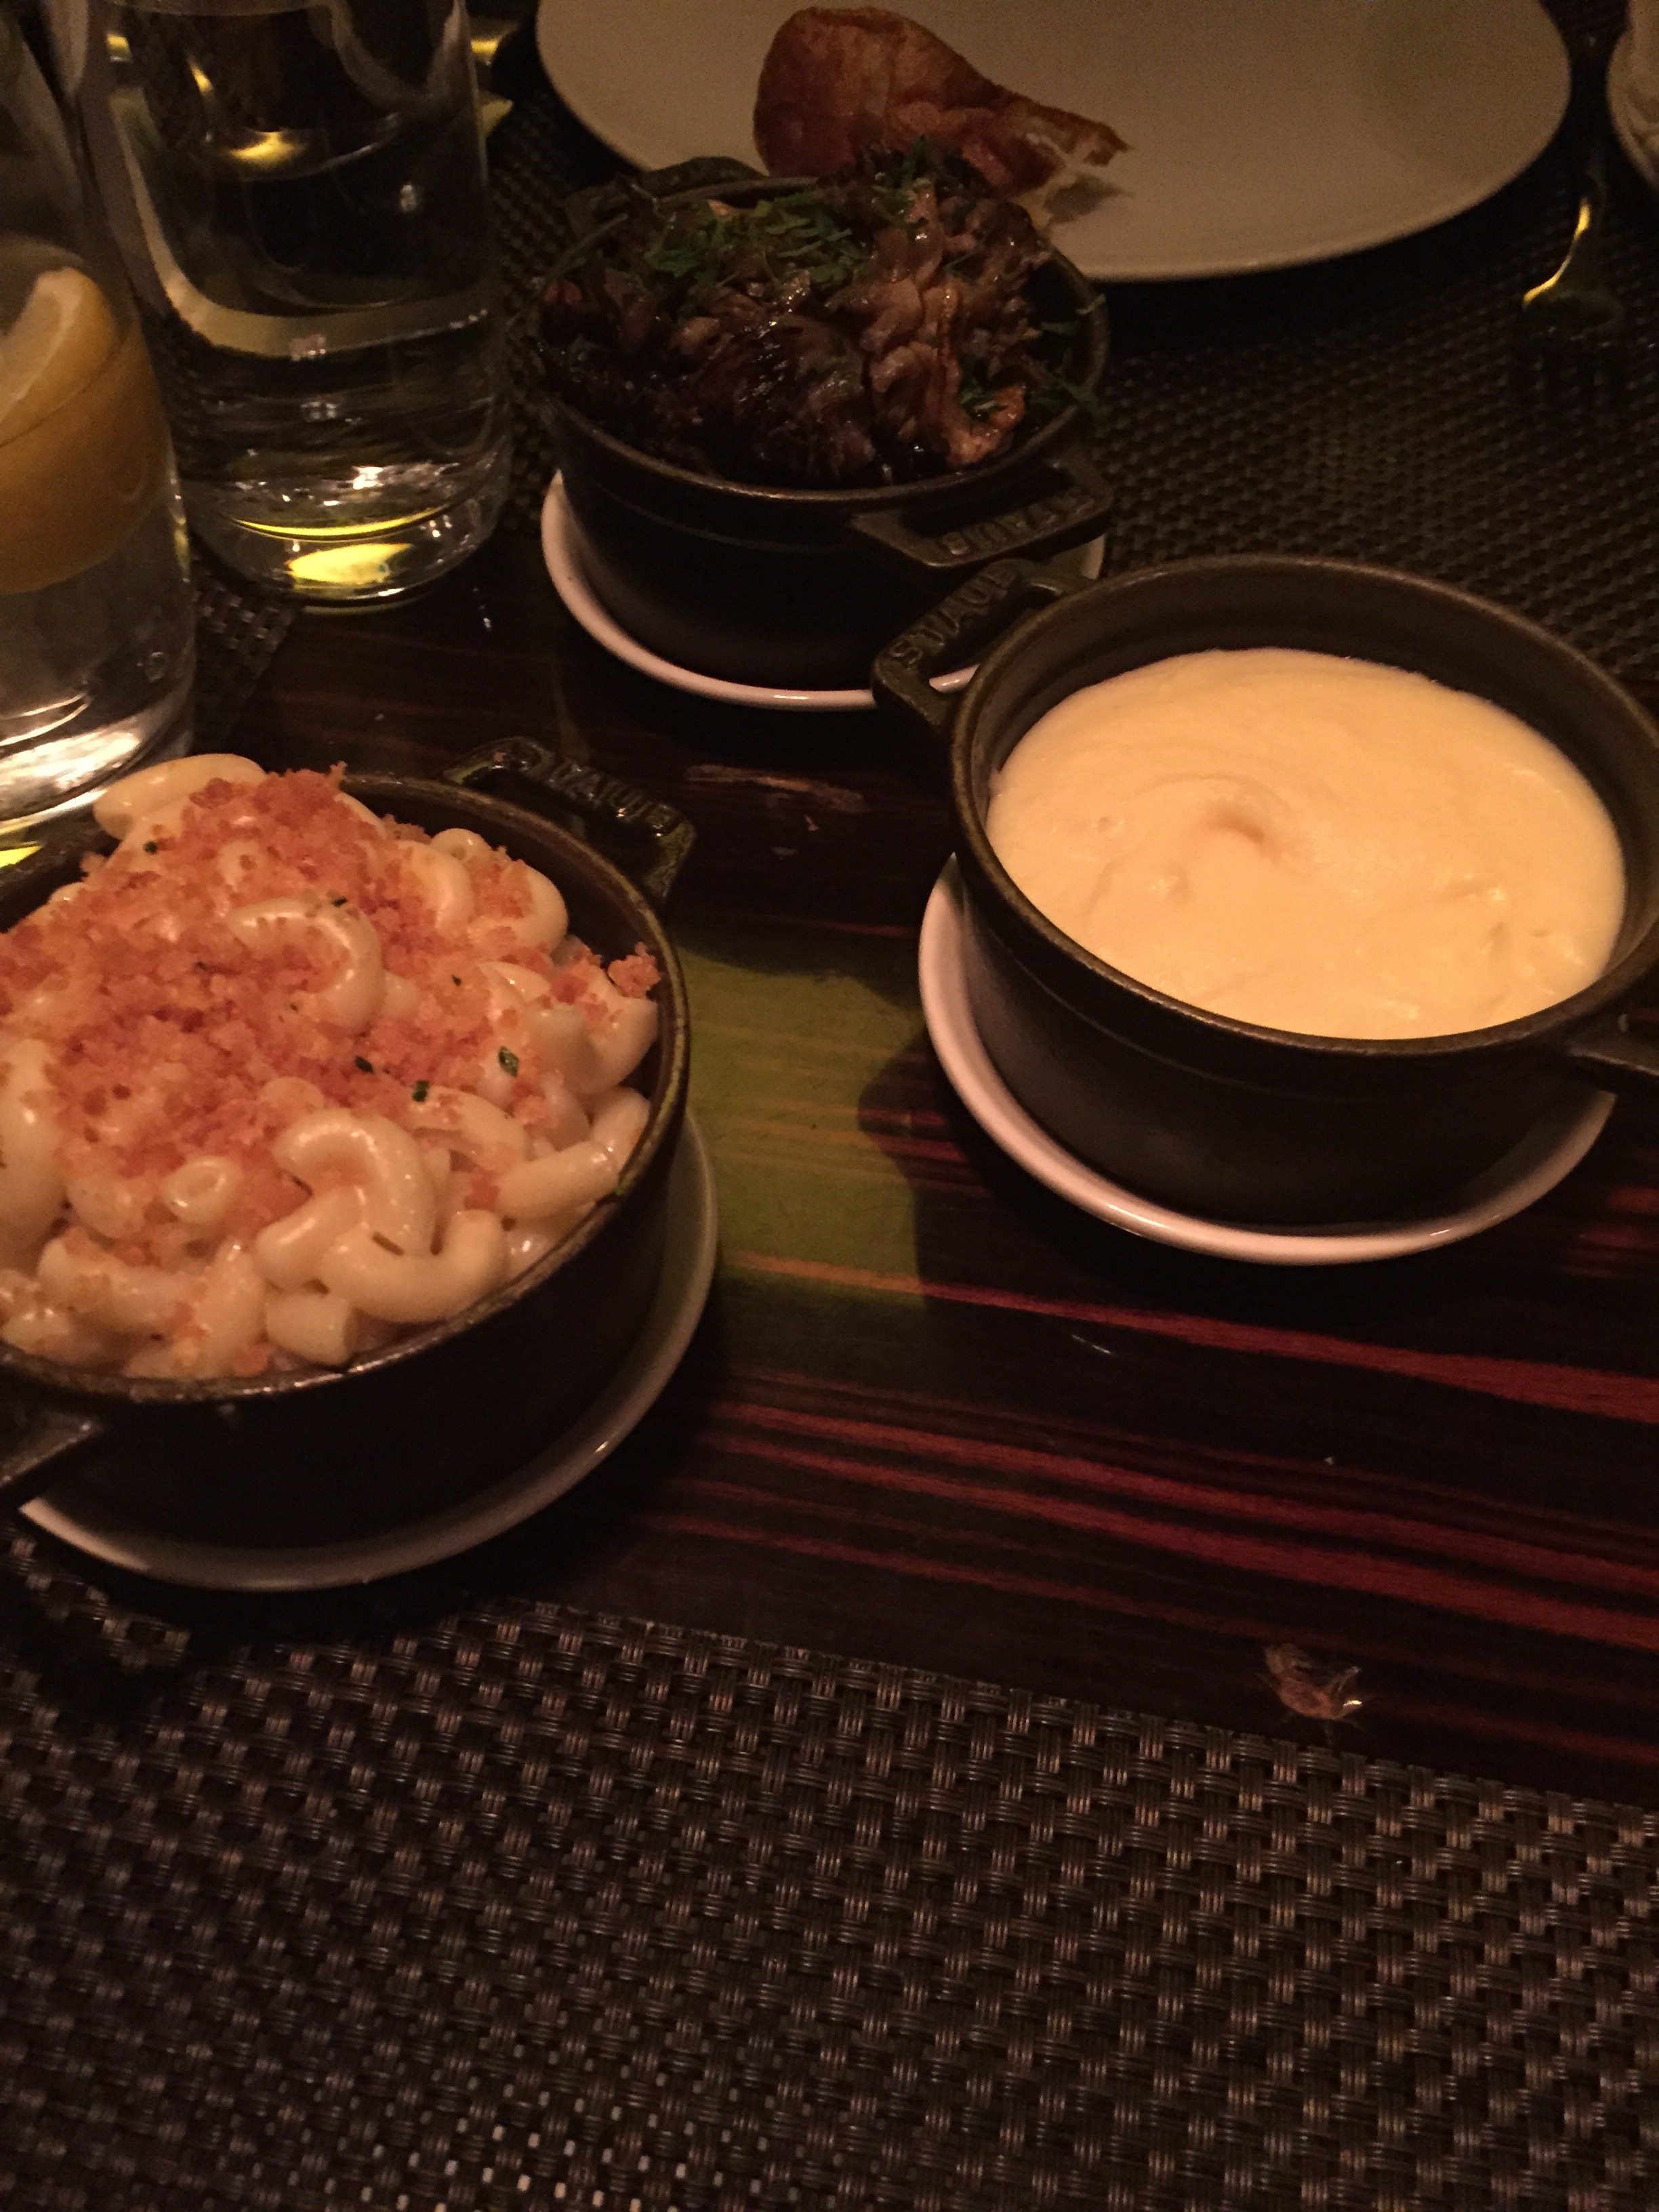
Side dishes: Mac and Cheese, Mashed Potatoes, and Mushrooms.
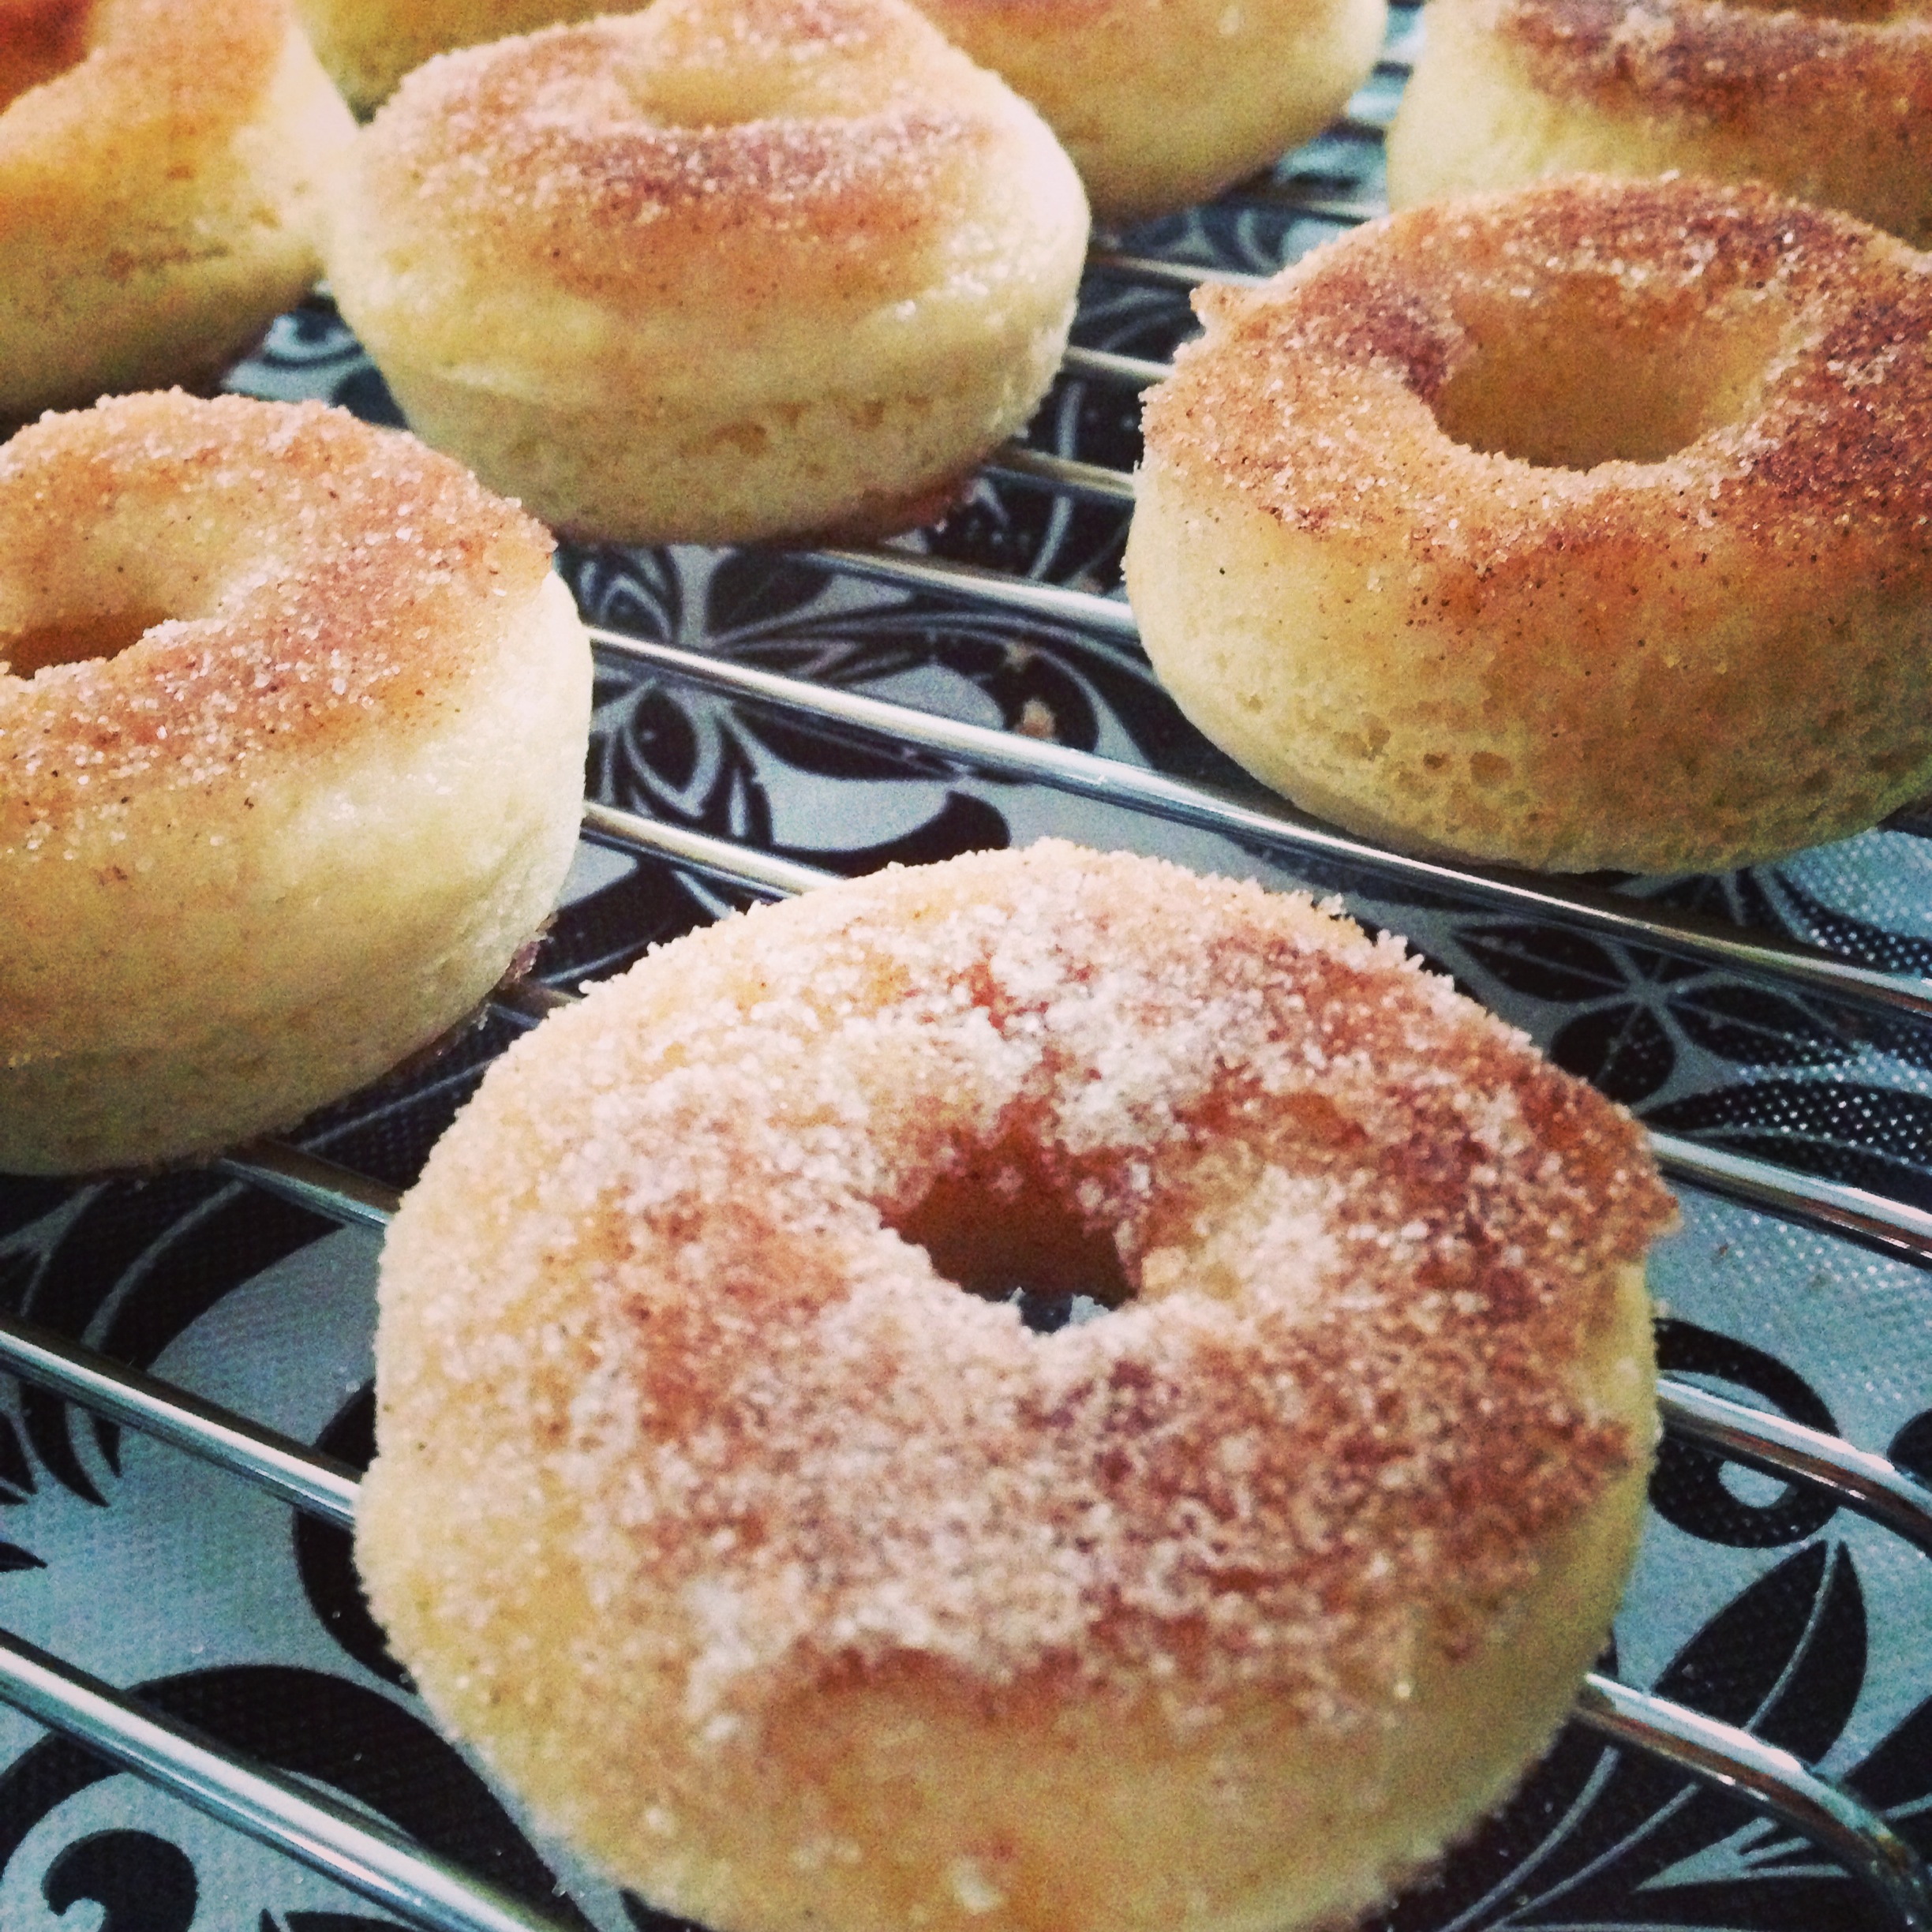
Even though our bellies were so full, we knew we had to order some desserts. After chatting with the general manger, he made some recommendations. We are dessert people after all! We were delighted to be presented with three desserts that were the best possible way to end a fabulous meal — A Peanut Butter Mousse with Banana Ice Cream, Carrot Cake, and Doughnuts!! You guys, I didn’t even know where to start…one dessert was better than the next!

Carrot Cake
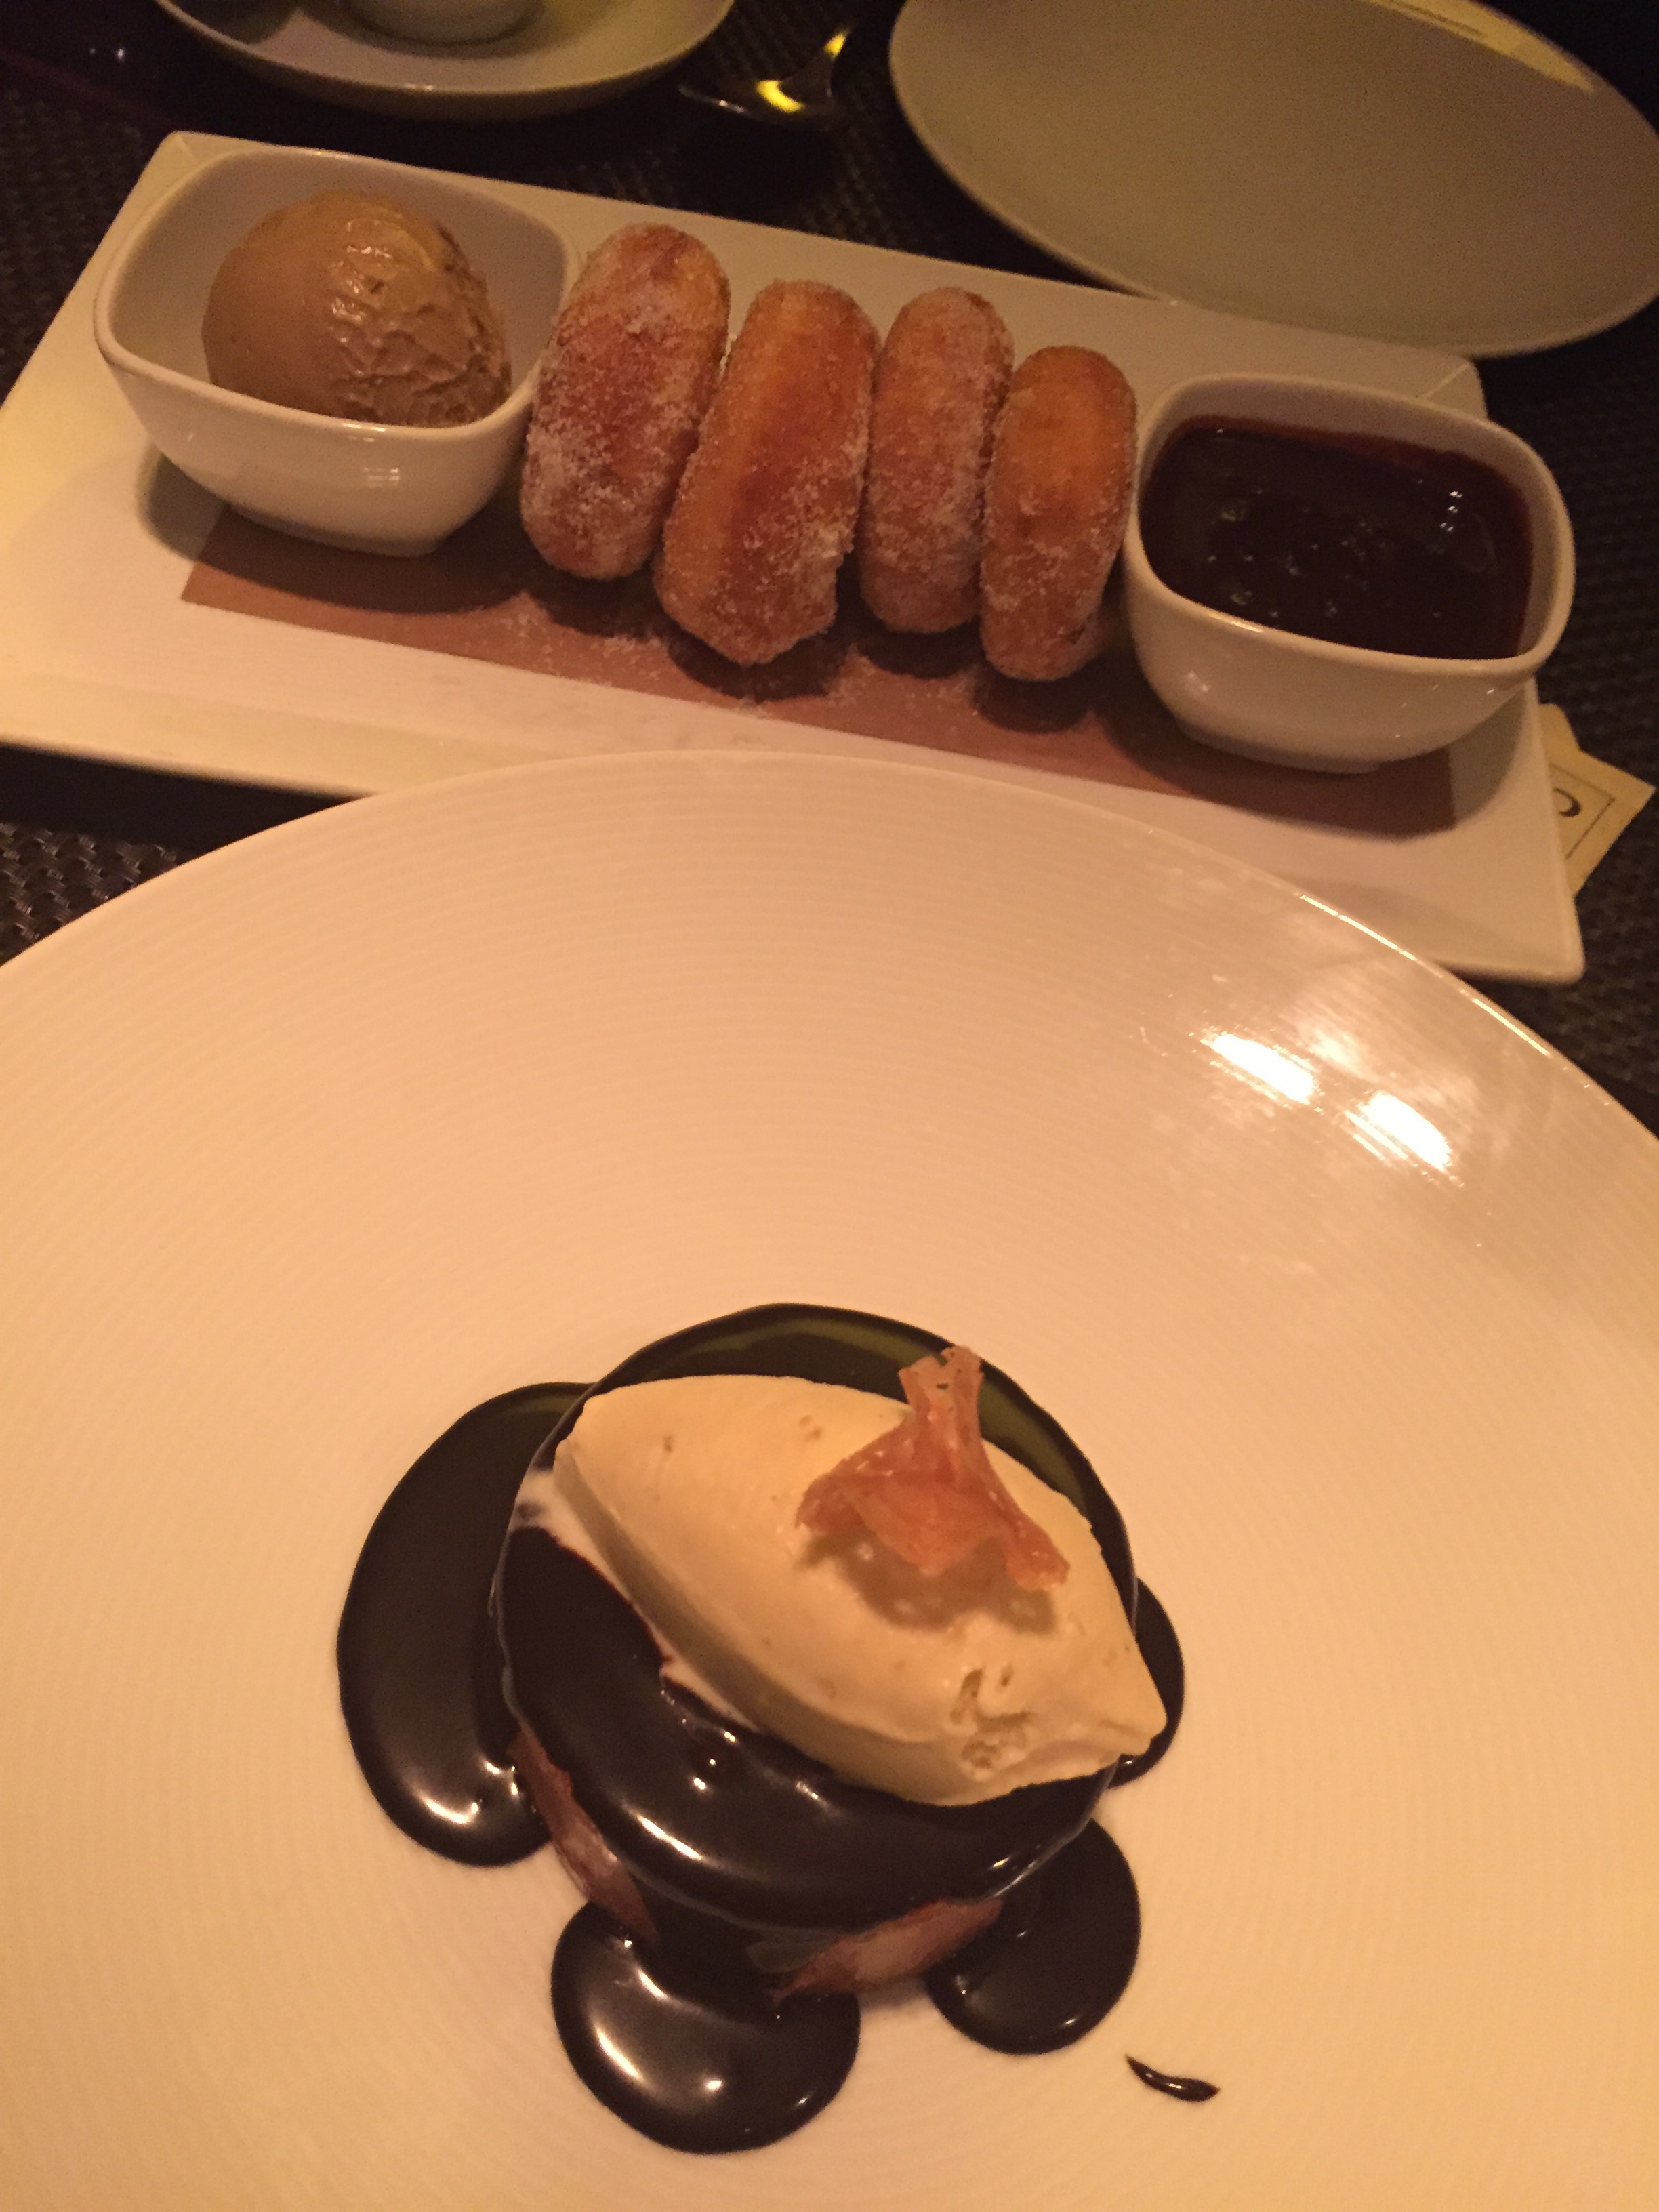
Donuts with Coffee Ice Cream and Peanut Butter Mousse with Banana Gelato!!!!!
Please do yourself a favor and put this on your list of places to dine at the next time you find yourself in the city! I promise you will not be disappointed with the food or the service! Happy Eating!
With love and sugar, Kristen xo.
PS- I went and bought a Pop Over pan over the weekend!! I’ll let you know when I try making them myself! =)