The Streets of Philadelphia…#tbt

Tonight, I bring you another #tbt food trip…

I’ve been to Pennsylvania many a time growing up, but never made it to the streets of Philadelphia until 3 years ago. Since I I was only going to have a day to spend in the city of “brotherly love”…I affectionately named the trip my “Philly Food crawl.” It was a day of nothing but walking and eating and I was ready!!!

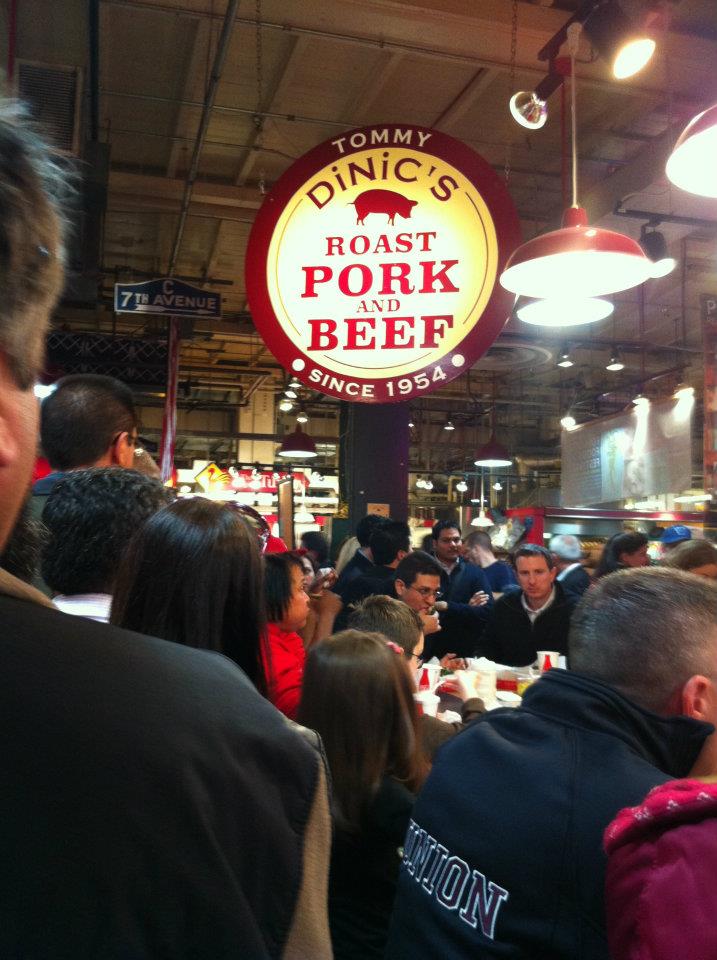
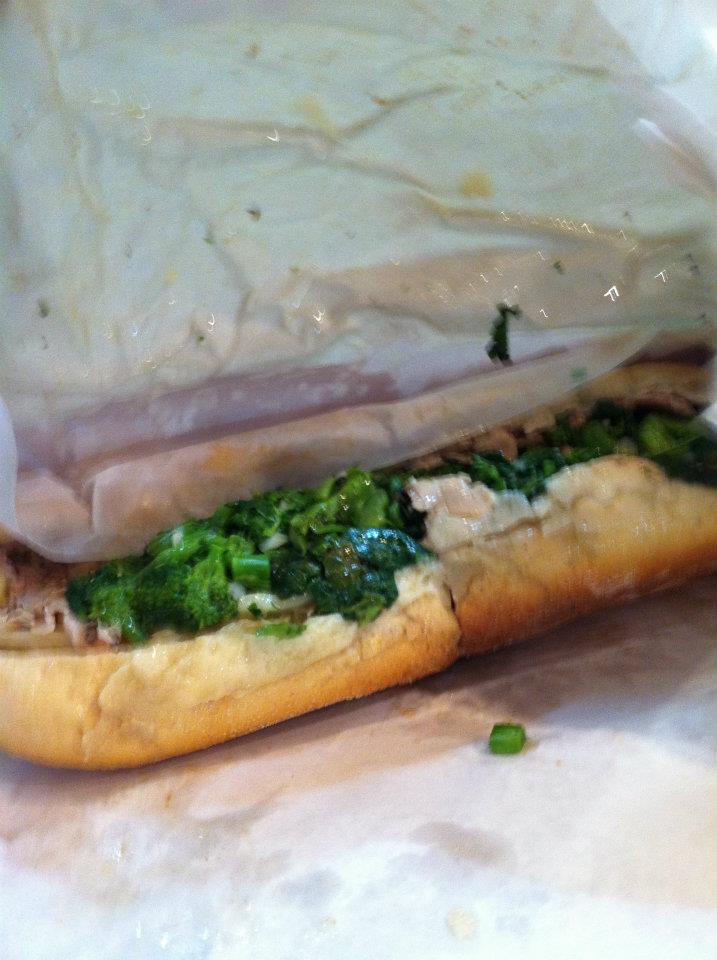
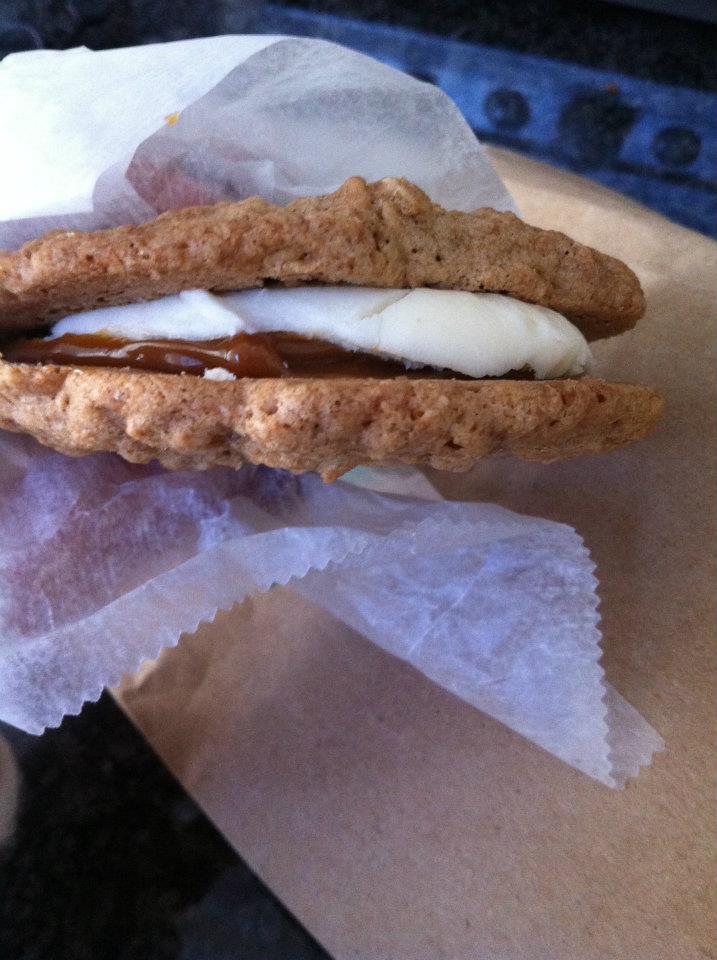
The morning started with a trip to the Liberty Bell and then to Reading Terminal Market, which was totally a foodie paradise!! I couldn’t wait until lunch because I knew I would be heading straight to DiNic’s for their roast pork sandwich. I first saw this sandwich featured on Man V. Food and I knew I had to add this to my list. Let me tell you though, the market was packed!!! and so was DiNic’s, but that wasn’t stopping me… I love a good a sandwich, and boy…this was a GOOOOOD sandwich!! Well worth the wait. I loved the broccoli rabe, provolone and juicy pork combo…I would probably travel back to philly with my only intention to be to have this sandwich…mmm…I continued to walk around taking in all the amazing food sights. I made my way to Flying Monkey to pick up some desserts to bring home with me (see, I share too!). I think my favorite treat was the oatmeal cream pie, like the ones I used to have in my lunch box, except they took it to the next level by adding a layer of caramel!! sooo delish!!! I walked passed Delilah’s, which is Oprah’s favorite spot for mac and cheese and I totally wished I would have tried some Bassetts Ice Cream, but I had other plans in mind for the pursuit of ice-cream…

312105_792241903953_881048737_n

379394_792239334103_871242059_n

312557_792246419903_680371762_n

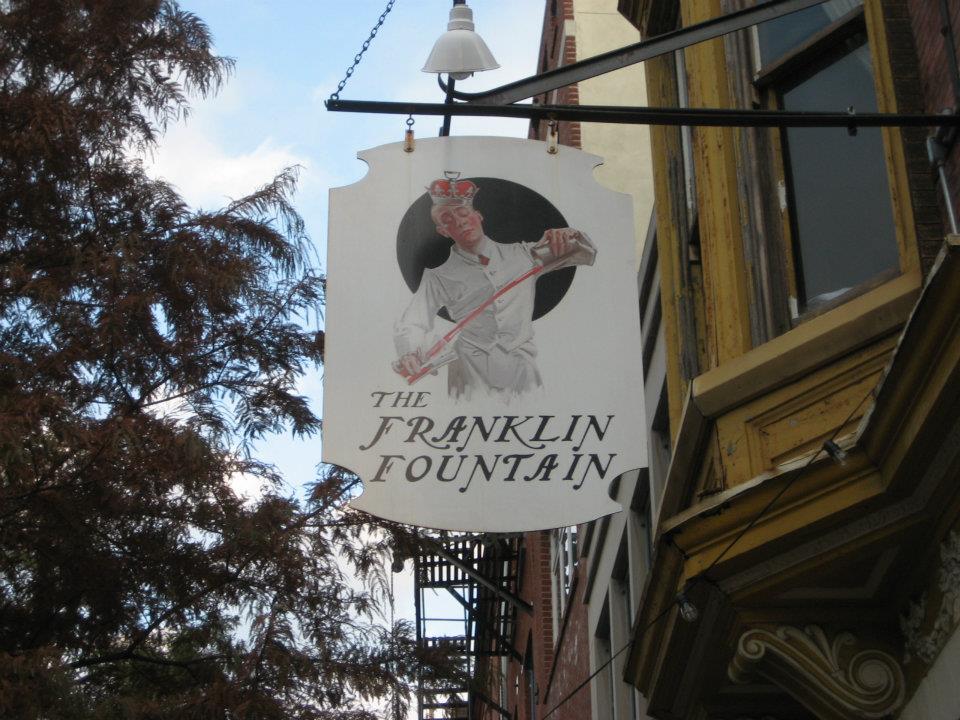
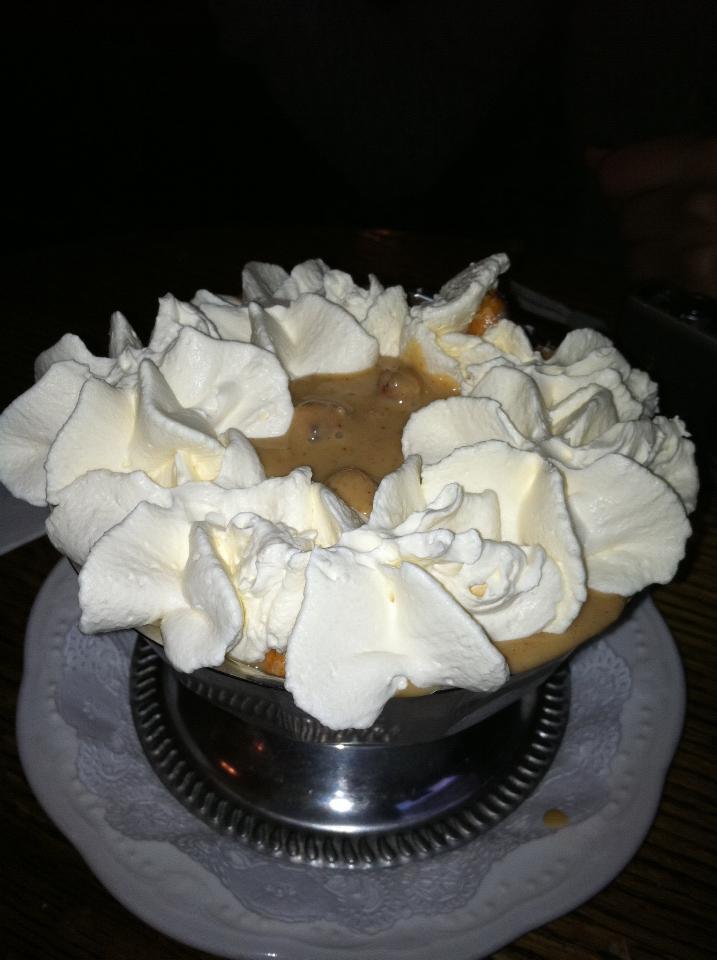
I did some more sight seeing and then headed to The Franklin Fountain!!! An old fashion soda and ice-cream parlor. It was totally adorable. There were so many yummy sundaes to choose from, but I finally decided on the “Stock Market Crunch” which was homemade rocky road ice-cream, peanut butter sauce, and crunchy-salty pretzels…I KNOW, RIGHT?!?! it was unreal. I actually forgot how amazing this sundae was until I looked back on my trip to write this post…

380114_792254014683_1388977728_n

384252_792244543663_1197043082_n

I did some more sight seeing and LOTS of walking until it was dinner time…now, you know I can’t leave philly without a cheesestake, so the day ended at Jim’s Steaks. They have a special lingo when ordering, so I made sure I was properly instructed on how to do so. I ordered a “whiz wit”…the iconic sandwich did not disappoint. It was sooo tasty. The perfect way to end my philly food crawl! It was time to head back to New York…thanks for the memories and most importantly, the food philly…I’ll be back!!

297338_792256384933_1219897699_n302248_792257118463_1319947944_n

With love and sugar, Kristen xo.

Time To Warm Up!

One thing that makes me look forward to the winter months here in New York are warm, comforting, and hearty meals. With the temperatures still being veryyy cold, chili is definitely an easy  go to meal and what’s so great about chili is that there are many different ways to make it which means you can switch it up and feel like you’re having a new meal each time you make it. The one we made tonight is from Giada’s cookbook, “Giada At Home.”  I can prepare it when I get home from work and it can cook away on the stove while I complete any school work I might have before dinner. Wahoo!!

40208_636887650123_3706676_n

I have been a long time fan of Giada DeLaurentiis since I first caught an episode of her show “Everyday Italian” on my tiny dorm room TV and she was making Chicken Tetrazzini. It looked yummy and she made it sound so easy. I quickly looked up the recipe and noticed that the ingredient list was simple too. She really inspired me to get in the kitchen. She gave me the confidence that I could cook anything! Many of her recipes are not only easy to follow but taste amazing. I have collected all of her cookbooks, met her at several book signings, and continue to watch and follow her.  I even learned that our families are from the same region in Italy. Needless to say, this will not be the last recipe of hers you will see on here.

IMG_2609

This recipe calls for all species that I keep in my spice rack at all times! The only change I make is I omit the fennel seed. I actually like fennel, but my mom is not a fan so I just leave it out. No biggie. I love the she puts swiss chard and corn in this recipe! What a great addition to a chicken chili, and you know what’s even better than a quick meal? …having enough leftover to bring for lunch the next day!!! You need this recipe in your life!!!

White Bean and Chicken Chili

Ingredients
2 tablespoons olive oil
1 large onion, chopped
4 garlic cloves, minced
2 pounds ground chicken
1 teaspoon salt, plus more for seasoning
2 tablespoons ground cumin
1 tablespoon fennel seeds
1 tablespoon dried oregano
2 teaspoons chili powder
3 tablespoons flour
2 (15-ounce cans) cannellini or other white beans, rinsed and drained
1 bunch (about 1 pound) Swiss chard, stems removed, leaves chopped into 1-inch pieces
11/2 cups frozen corn, thawed
4 cups low-sodium chicken stock
1/4 teaspoon crushed red pepper flakes
Freshly ground black pepper for seasoning
1/2 cup grated Parmesan cheese
1/4 cup chopped fresh flat-leaf parsley

Directions
In a large heavy-bottomed saucepan or Dutch oven, heat the oil over medium-high heat. Add the onion and cook until translucent, about 5 minutes. Add the garlic and cook for 30 seconds. Add the ground chicken, 1 teaspoon salt, cumin, fennel seeds, oregano, and chili powder. Cook, stirring frequently, until the chicken is cooked through, about 8 minutes. Stir the flour into the chicken mixture. Add the beans, Swiss chard, corn, and chicken stock. Bring the mixture to a simmer, scraping up the brown bits that cling to the bottom of the pan with a wooden spoon. Simmer for 55-60 minutes until the liquid has reduced by about half and the chili has thickened. Add the red pepper flakes and simmer for another 10 minutes. Season with salt and pepper, to taste.

Ladle the chili into serving bowls. Sprinkle with the Parmesan cheese and chopped parsley.

IMG_2610

I usually like chili with a nice wedge of cornbread on the side, but to my dismay, I realized we didn’t have cornmeal in the pantry!! boo…(note to self, add it to the food shopping list) Luckily, we did have some tortilla chips to serve it up with! Mmmm…warmed me right up! Perfect meal for a “chili” night…sorry…I couldn’t help myself…

With love and sugar, Kristen xo.

It’s Not A Party Without Some Chocolate!

My week off went super fast! Tomorrow it’s back to the daily grind. I just finished dinner, grading papers, lesson planning, and packing my lunch. During the week, my cooking is usually quick and simple. I usually have more time to try new recipes on the weekends and during the summer months, but don’t worry…I will be posting another throwback food trip on Thursday and have a few other things up my sleeve…

Yesterday we celebrated my sister-in-law’s 30th birthday!!! woo!!! It was such a good time. Her actual birthday isn’t until the 26th, but I think that’s what’s so great about birthdays. You can start the celebration early and keep it going as long as you can. I know I celebrate mine for at least a week! haha My favorite thing to do for someone’s birthday, or for any special occasion, is to obviously bake for them and since this was a very special birthday, I wanted to try something different. In my family, you can always count on there being a lot of food, but then you can also count on there being a CRAZY amount of desserts. Deanna loves anything chocolate so I knew that I had to find something chocolatey to make for her. A friend of mine had talked about a recipe for “chocolate lasagna” that they had made for their Suer Bowl party and after doing a little searching on the internet, I found it!! It’s a no-bake dessert which means you can make it the day before if you are pressed for time. I actually like preparing these types of recipes a day before anyway since I think they taste best when they can sit in the fridge overnight.

IMG_2590

IMG_2591


It requires a whole package of cookies which means a random broken Oreo could not be tasted during the process, darn!

Like it’s cheesy, saucy cousin…this chocolate lasagna is layered! It starts with an Oreo crust, followed by a sweet cream cheese layer, chocolate pudding, and then topped with more whipped cream and mini chocolate chips! yumm… As I was making this I was thinking how you could totally change it up and experiment to try different variations and flavors based on the same layering technique. I always stick with a recipe before I try changing it up though.

IMG_2593

IMG_2594


Once it’s all layered up, you could freeze it for an hour or put in the fridge for at least 4 hours, however, like I said…the longer it sits, the better! Oh the recipe, right!!…http://centercutcook.com/chocolate-lasagna/

INGREDIENTS

1 package regular Oreo cookies (Not Double Stuff) – about 36 cookies

6 Tablespoon butter, melted

1- 8 ounce package cream cheese, softened

1/4 cup granulated sugar

2 Tablespoons cold milk

1- 12 ounce tub Cool Whip, divided

2 – 3.9 ounce packages

Chocolate Instant Pudding.

3 1/4 cups cold milk

1 and 1/2 cups mini chocolate chips

DIRECTIONS

Begin by crushing 36 Oreo cookies. I used my food processor for this, but you could also place them in a large ziplock bag and crush them with a rolling pin. When the Oreos have turned into fine crumbs, you are done. Transfer the Oreo crumbs to a large bowl.

Stir in 6 tablespoons melted butter and use a fork to incorporate the butter into the cookie crumbs. When the butter is distributed, transfer the mixture to a 9 x 13 inch baking dish. Press the crumbs into the bottom of the pan. Place the pan in the refrigerator while you work on the additional layers.

Mix the cream cheese with a mixer until light and fluffy. Add in 2 Tablespoons of milk, and sugar, and mix well. Stir in 1 and 1/4 cups Cool Whip. Spread this mixture over the crust.

In a bowl, combine chocolate instant pudding with 3 and 1/4 cups cold milk. Whisk for several minutes until the pudding starts to thicken. Use a spatula to spread the mixture over the previous cream cheese layer.

Allow the dessert to rest for about 5 minutes so that the pudding can firm up further. Spread the remaining Cool Whip over the top. Sprinkle mini chocolate chips evenly over the top. Place in the freezer for 1 hour, or the refrigerator for 4 hours before serving.

IMG_2595

As you can see, this is a very simple dessert and the result is oh so delicious!! I also made Funfetti Cupcakes for the party, but those were made from good ol’box cake mix…like what we remember from when we were kids which sometimes is just what you are craving, however, one reason I started this blog was to push myself try new things so I am hoping to try more cake recipes from scratch at some point.

Hope you guys have a fantastic week with maybe some chocolate involved!!

With love and sugar, Kristen xo.

On Thursdays We Do Throwbacks

I am very excited to share with you some “throwback” food trips. What is a food trip? Well, over the past few years, I have tried to make it a priority to travel more, then combine that with the countless hours of food tv I watch and you get…a food trip!! Once I know where I am going, I then make a list of the food places that I want to try! Many of them are picked based on what I have seen on various tv shows, as well as, my own research. Finding places to eat at has become my unofficial job whenever I am heading someplace with my friends and family.  Even destinations that I go to time and time again, I am always searching for something new to try! First stop…Washington, DC.

Image

I’ve been wanting to travel to DC for some time, but it wasn’t until last summer that I finally made it happen. I recruited a friend of mine from work, who had also never been to DC, to come with me. This trip was not only about trying the restaurants I had planned out, but I was also really excited to explore and visit all the museums! I had 3 days to get as much done as possible! The first day was spent going on a tour of all the beautiful monuments and must see attractions. It was well worth it! I would have never been able to see everything if it wasn’t for the tour. The guide was very informative (and funny!!) and it made me want to brush up on my American History. My nerdy/teacher side definitely came out. I took LOTS of pictures, but I’ll stick to the food, and maybe throw some in for good measure…haha

IMG_2026 IMG_1953

After a long day of playing tourist, we headed into Georgetown for an Italian meal from the “Pasta Mammas” at Filomena Ristorante (luckily, they were super nice because I actually screwed up the reservation…ah!!). You can see the Mammas making the pasta in the window! soo cool!!

IMG_2031

Before I even sat down I knew what I wanted to order, their fresh homemade Ravioli. WOW!! The portion was huge and it sure made my tummy happy! After all the pasta, we walked around Georgetown. Lots of shops and cobblestone walkways! It was really nice! I know you’re waiting for me to say that I stopped for cupcakes at the famous Georgetown Cupcake, but confession, I was actually to the one they opened in NYC before I came to DC. I did make sure to walk past and see the original location though.

IMG_1855

The second day was museum day. Most of the museums have free entry, but we did go to some others as well. I think my favorite was the Museum of American History. It had some fun exhibits, like the one on FOOD…it’s where they have Julia Child’s kitchen, so no surprise as to why this was one of my favorites. On our way out of the museum, we noticed that their was a book signing and you know who it was with? The pastry chef from the White House!!

IMG_2064 IMG_2081

IMG_2091

We went to Good Stuff Eatery for lunch which is Top Chef Spike Mendelsohn’s burger place. The burgers were yummy!! I had a turkey burger with Muenster cheese and avocado. I only wish the fries were a bit more crispy. They also have some delicious milkshake options. Spike also has a really cool pizza place next door called “We, The Pizza” haha love that!

IMG_1891

After our marathon day of walking and museum hopping, I think we walked for a total of 8 hours, no joke…it was time for the meal I had been waiting for…dinner at Founding Farmers!!! What makes this place unique is it run by American Family farmers. (Find out more here…http://www.wearefoundingfarmers.com) Upon entering, we took a seat at the bar since there was a small wait, and were presented with a very impressive drink menu. I knew I wanted to try something different and since the bartenders are trained mixologist I knew everything would be good. I went with the “El Presidente” sooo perfect for a hot summer day and I loved the color!! It had Rum, lime, pineapple and housemade grenadine. The meal was just as impressive. To start, we ordered the skillet cornbread…I need to just pause for a second because I’m just remembering how amazing this was……and it came with honey butter with sea salt!!!! ARE YOU KIDDING ME?! sinfully good. I choose a classic american dish for my dinner choice, Yankee Pot Roast. The meat was so tender, the vegetables were so darn tasty, and it was all piled high onto some amazing mashed potatoes…I practically licked my plate clean. Their dessert menu sounded incredible as well, but I was stuffed! Imagine? I couldn’t even get dessert!! I wish I could have sampled the whole menu… I can’t wait to get back here!!!

IMG_2119IMG_1894

IMG_1895

IMG_1896


On the last day of our trip, we spent the morning at Arlington National Cemetery and then went to The Dupont Circle farmer’s market. I love Farmer’s Markets and I heard that this one was great so I knew I had to make a point to get there. The market had so many wonderful things, but it was hard to look around since it was pouring!! womp womp…BUT I did manage to get a Jar of some pretty awesome homemade pickles, score!!

IMG_1897
IMG_1898


We needed lunch before the drive back to Long Island and I had just the place…Ben’s Chili Bowl!! I first saw this place on Man v. Food and knew it had to be on my DC food list. This simple bowl of chili packed a tun of flavor!!

IMG_1903IMG_1900


This is by no means the only places in DC to eat at. I had many other great recommendations from friends who had either lived in or been to the city before, but these were just the ones that made it to my list. Like any city, there are so many great places to try! I hope to be back to DC one day to try more of what the city has to offer, and hopefully, these recommendations will make it to your list the next time you find yourself in our Nation’s Capitol.

With love and sugar, Kristen xo.

Give Me Some of That Yum Yum Chocolate Chip…

I know Salt-N-Pepa were not talking about cookies in their hit song from the early 90s, but I am…

Fact. I love cookies…and I hope you all do too, because I promise you that there will be many more cookie recipes to follow. Most of my cookie baking happens during December for obvious reasons (SANTA!!) and then I have my year round cookie recipes that I make whenever I need my cookie fix. 

The one I made today is ‘Vanishing Oatmeal Raisin Cookies’ which can be found under the lid of the Quaker Oatmeal container. My family request this one so much that I have it memorized. It was snowing here again this morning so I decided to mix up a batch. I asked my sous chef, aka mom, to help me out. She and I really make the perfect team. I bake and she cleans the dishes! haha…it’s a nice little system we have.  


Image

The recipe calls for 1-cup of raisins, but I opted for 1-cup of chocolate chips which to me is a no brainer. Don’t get me wrong, I like raisins, but I prefer the flavor of the chocolate chips mixed in with the oats and cinnamon. I’ve even seen recipes that call for Raisinets, which I think is BRILLIANT, but have yet to try it. If you have, let me know how they turned out!! (probably delicious).

I don’t know what I would do without my KitchenAid mixer. It was actually my 21st birthday gift hahaha…makes mixing up batter so much easier!


Once the batter was all mixed together, I made it rain……chocolate chips!!

Image


I use a cookie scoop for all my cookies so they come out even. I have two different scoop sizes, but tend to like cookies on the bigger side. I have been known to use an ice-cream scoop for certain cookie recipes!  

Image


Vanishing Oatmeal Raisin(or chocolate chip) Cookies

http://www.quakeroats.com/cooking-and-recipe/vanishing-oatmeal-raisin-cookies.aspx

INGREDIENTS:
1/2 Cup(s) (1 stick) plus 6 tablespoons butter, softened
3/4 Cup(s) firmly packed brown sugar
1/2 Cup(s) granulated sugar
2 Eggs
1 Teaspoon(s) vanilla
1-1/2 Cup(s) all-purpose flour
1 Teaspoon(s) Baking Soda
1 Teaspoon(s) ground cinnamon
1/2 Teaspoon(s) salt (optional) 
3 Cup(s) Quaker® Oats (quick or old fashioned, uncooked)
1 Cup(s) raisins 

PREPARATION:
Heat oven to 350°F. In large bowl, beat butter and sugars on medium speed of electric mixer until creamy. Add eggs and vanilla; beat well. Add combined flour, baking soda, cinnamon and salt; mix well. Add oats and raisins; mix well. Drop dough by rounded tablespoonfuls onto ungreased cookie sheets. Bake 8 to 10 minutes or until light golden brown. Cool 1 minute on cookie sheets; remove to wire rack. Cool completely. Store tightly covered.


These cookies are perfect for filling that empty cookie jar. The only hard part is trying not to sample them hot out of the oven, because I think these taste best when they have cooled completely, and of course served with a nice glass of cold milk!! 

Image


With love and sugar, Kristen xo.

#Tonightshow #Applecrisp

Who’s excited for the 1st episode of The Tonight Show with Jimmy Fallon? I am!! I can’t wait to see what hilarious antics he has come up with and I am even more excited that he’ll be having Justin Timberlake as a guest on Friday’s show. Obviously, we need a ‘late night’ snack tonight so I whipped up the quickest dessert I know, an apple crisp. Now, I know what you’re saying, “Kristen, it’s not fall, it’s not apple season” and you are absolutely correct, but who says we can’t bend the rules a little? I always have the ingredients on hand and when I need something comforting, a crisp does the trick. I have tried many different recipes, but recently found one in Cooking Light magazine that was awesome! It was the perfect amount of warm gooey apples to crumble ratio…I then topped it with cold vanilla ice-cream…so yummy and easy, trust me! and there is nothing wrong with making a little extra crisp topping, I won’t tell! hehe…

Image

Maple-Walnut Apple Crisp

Ingredients

  • 1/3 cup all-purpose flour
  • 1/2 cup packed light brown sugar
  • 1/3 cup regular oats
  • 1/4 teaspoon ground cinnamon
  • 1/4 cup chilled butter or stick margarine, cut into small pieces
  • 3 tablespoons chopped walnuts
  • 7 cups sliced peeled Rome apple (about 3 pounds)
  • 1/4 cup maple syrup
  • 1/2 teaspoon ground cinnamon

Preparation

  1. Preheat oven to 375°.
  2. Lightly spoon flour into a dry measuring cup; level with a knife. Combine flour, sugar, oats, and 1/4 teaspoon cinnamon in a medium bowl; cut in butter with a pastry blender or 2 knives until mixture is crumbly. Stir in walnuts.
  3. Combine apple and remaining ingredients in a large bowl; toss well. Spoon apple mixture into an 8-inch square baking dish or 1 1/2-quart casserole. Sprinkle with crumb mixture. Bake at 375° for 45 minutes or until golden brown. Serve warm.

http://www.myrecipes.com/recipe/maple-walnut-apple-crisp-10000000223084/

I am a big fan of many recipes from Cooking Light magazine! This one will definitely be a “go to” for me and according to my watch you still have plenty of time to make this to have while you’re snuggled up on the couch watching Jimmy Fallon!! …oh, and don’t think I forgot about it being President’s Day…I have a special “Throwback Thursday” post for this week from my trip to Washington, DC that I took last summer!! There was food and lots of history to be discovered!

With love and sugar, Kristen xo.

All You Need Is Love & A Good Slice of Pizza!

Ahh, Sunday. During the school year, I usually spend my Sundays hangin’ around the house, grading papers, and preparing a comforting meal and dessert, however, since I am off for February break I was able to spend the day in one of my favorite places, Manhattan! Alright, I am going to let you all in on a little, no, BIG secret…My favorite place, to get my favorite food.

I give you…Rubirosa Pizza & Ristorante!!!

http://rubirosanyc.com

Image

I stumbled upon this pizza heaven about 2 years ago when exploring the Nolita area. It’s located on Mulberry St. between Prince & Spring. I knew from the minute I walked in I was going to be in for a treat! The aroma reminded me of my great-aunt’s apartment in Brooklyn on a Sunday when my brother and I would fight over the italian bread to dip in the sauce before dinner time. This place does more than just amazing pizza. I have tried many things on the menu and everything is just spectacular.  Whenever my family and I are in the area, there is no question on where we want to eat. I simply can not get enough! I will even go as far to say that it is perhaps one of my favorite restaurant, hands down!

The pizza is thin and crispy which I just loveeeee!  My usual order is a Rubirosa salad for the table to share and a large classic pizza. The salad will knock your socks off. It has peppery arugala, tomato, basil, little mozzarella balls, big pieces of shaved parmigianno, and the best croutons you will ever have! (I kinda wish I ordered another one just to bring home with me, it’s that good!!)

Image

In honor of American Heart month and Valentine’s Day, there was a special pizza added to the menu in which all the proceeds go to One-Heart World Wide. The pizza is even shaped like a heart!!! I could not wait to try it! They call it “Tie- Dye Pizza” and it’s basically a pizza topped with the trifecta of italian sauces. You have your traditional tomato, creamy vodka, and herby pesto that’s then dotted with mozzarella.  It was unbelievably delicious! We devoured it in no time.

Image

Image


And, it would not be Sunday without a little pasta. One of my dad’s favorite dishes at Rubirosa is their Cavatelli with broccoli rabe and sausage in a garlic and oil sauce. Oh my word, it’s amazing! My fork found its way into that bowl of pasta a few times. Another great pasta dish, which we did not order today, is their version of the classic Spaghetti and Meatballs. Drool.

Image

Image


This blackboard sign was hanging up in the restaurant and it inspired the title for this post. I mean, I don’t think this statement could be more true. I know love and pizza are all I need and I’m pretty sure the Beatles would have even agreed too. So, Go!..like now!! Whether you are in Nolita, or have to make a special trip, I promise you will not be disappointed!! Your table at Rubirosa is waiting for you…

Image

With love and sugar, Kristen xo.

Hugs, Kisses & Valentine Wishes!

Happy Valentine’s Day!!! I couldn’t think of a better day to post my first blog entry than on a day that is devoted to sharing love and chocolate! but first, I have to take a moment to soak in the fact that I have FINALLY created a blog…a few of my friends have been encouraging me to start one, and I always said I would, but never did. Well, that all changes now! A big thank you to my friends Jackie and Chelsea for promising me last week, while housing delicious crepes at our good friend’s christening for their beautiful little baby girl, that they would read what I have to say, and the biggest THANK YOU goes to my amazing bestie, Brittany. For without her, none of this would have been possible. She has been wanting me to do this for the longest time and answered all my crazy e-mails about creating and naming this blog. You will be hearing a lot more about these wonderful people in the course of my posting, but onto the whole reason I have this blog…the food! oh, and please bear with me as I try to figure out the inner workings of the blogging world…I’m learning…ok…cookie time…

For those of you that do not know, we here on the east coast have been having a rough winter. Yesterday we were hit with a  snow storm that dropped a little over a foot of snow, which meant a snow day for those of us in the education profession, yahoo!! For me a snow day = baking, cooking, and relaxing! In such an occasion, my mom always makes sure we have a pizza dough ready to go and that I have ingredients for some kind of baked goodie.  So, I took advantage of my (5th hehe) snow day and prepared Valentine’s Day treats to give out to some of my coworkers. To me, sharing home baked goods is my favorite part of baking. From packaging it up all special and then getting to see the recipients face light up upon delivering the sugary confection, it’s the best! I had saved a recipe on Pinterest that I knew would be perfect…Chocolate Kiss Cookies! I loved how the colored sprinkles pop on the chocolate cookies and since it is Valentine’s day what’s better than chocolate kisses? 😉 These cookies could surly be adapted for any occasion. Just change the sprinkles, or the flavor of the kisses, the sky is the limit! I have posted the recipe below and here is the cute website where I found these yummy delights… http://www.thekitchenismyplayground.com/2013/01/chocolate-valentine-kiss-cookies.html 

IMG_2562
Ingredients
1 c. all-purpose flour
1/3 c. cocoa powder
1/4 tsp. salt
8 T. (1 stick) unsalted butter, softened
2/3 c. sugar
1 egg yolk
2 T. milk
1 tsp. vanilla extract
3/4 to 1 c. assorted Valentine sprinkles
25 to 30 Hershey Kisses or Hugs candies, unwrapped

Directions

  • Combine flour, cocoa, and salt; set aside.
  • With an electric mixer on medium-high speed, beat butter and sugar until light and fluffy, about 2 minutes. Add egg yolk, milk, and vanilla; mix until incorporated. Reduce mixer speed to low and add the flour mixture until just combined.
  • Wrap dough in plastic wrap and refrigerate until firm, 1 hour.
  • Roll chilled dough into 1-inch balls and roll each ball in sprinkles, completely covering the dough ball with sprinkles. Place balls about 2 inches apart on a baking sheet. With your thumb, gently press down into the center of each ball just slightly to make a very small indentation. Chill the baking sheet of dough balls in the refrigerator for 10 to 15 minutes.
  • Bake at 350 degrees until set, about 12 minutes.
  • After removing cookies from the oven, immediately place a Hershey Kiss or Hug in the center of each cookie. Let cookies cool on the baking sheet for about 3 minutes, remove to a cooling rack to cool.

Makes approximately 25 to 30 cookies.

Here they are all ready to be delivered!

IMG_2563Cute, right? I encourage you to get in the kitchen and start cooking! These were super easy to make and delicious!

With Love and Sugar, Kristen xo.